SERIES: Let's build SupaAuth #6
Magic Links & 3rd Party Login


7 min read • –––

You're on part 6 of the 6-part series Let's build SupaAuth where You'll build an authentication system using Supabase and Next.js
3rd Party & Other Login Approaches
In the last few articles, you learned
- how you can set up a complete email/password-based authentication system using Supabase
- how you can secure pages that are meant to be viewed only by authenticated users
We have just a few more approaches left to go now.
Many modern apps just launch with third-party logins to make the user onboarding journey a no-frills experience. They tap into the value of the accounts that your users already have on various platforms like Facebook, Twitter, Github, etc. It's not necessary to seek all of the user details upfront. You can always give ways to update a user's profile and collect additional details post signups.
Let's explore how can we achieve similar goals with Supabase. We'll use Github as our 3rd party user details provider.
3rd Party Logins
Doing Third-party logins in Supabse is outrageously simple. You'd be amazed to find that's there's no new API method to learn, and not much React to write, besides, yeah obviously - creating the Github App, putting a button for login, and calling a method we've already visited in this series.
Create the Github App
To create a Github App, visit https://github.com/settings/applications/new

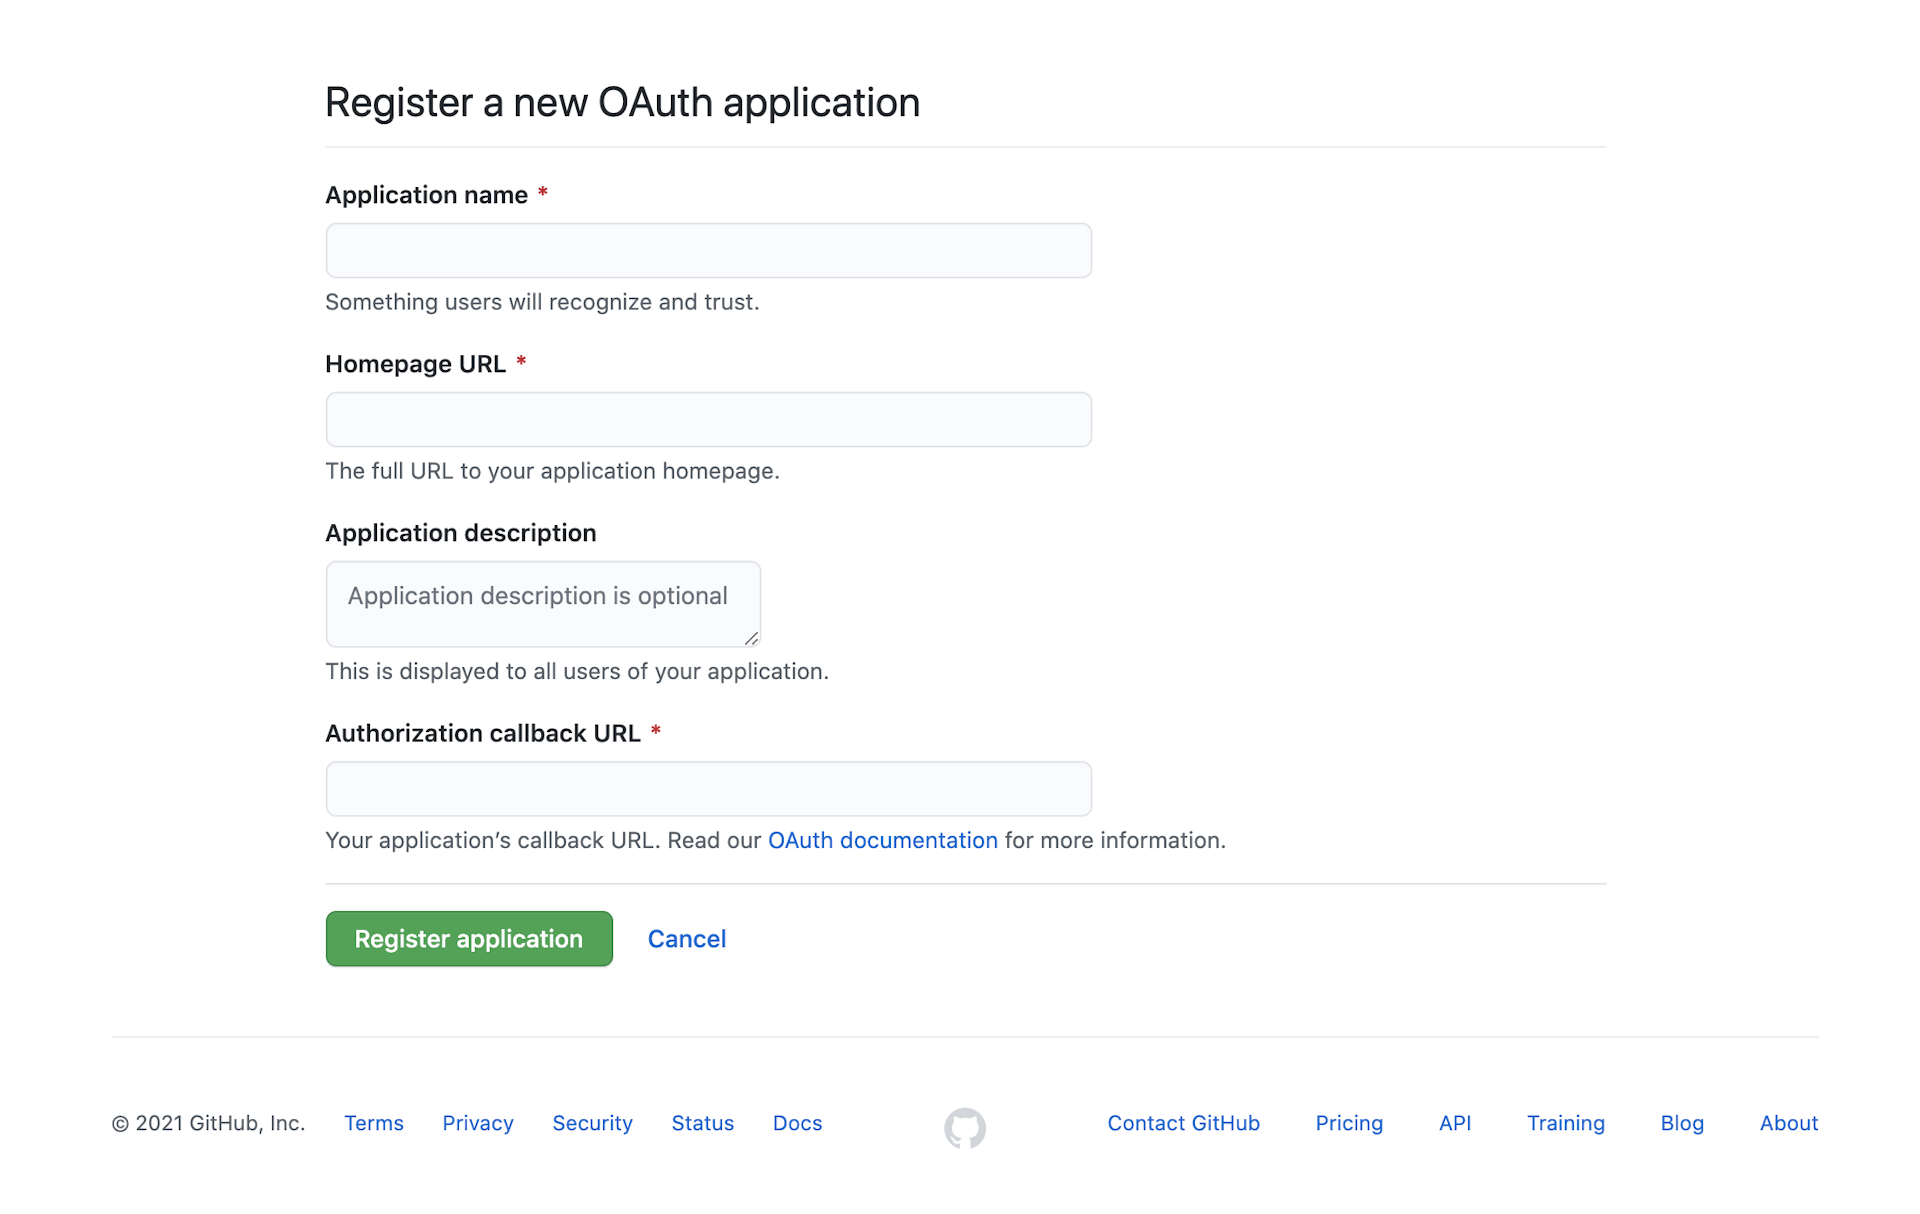
and provide
- Application Name
- HomePage URL
- Authorization Callback URL
and other necessary details.
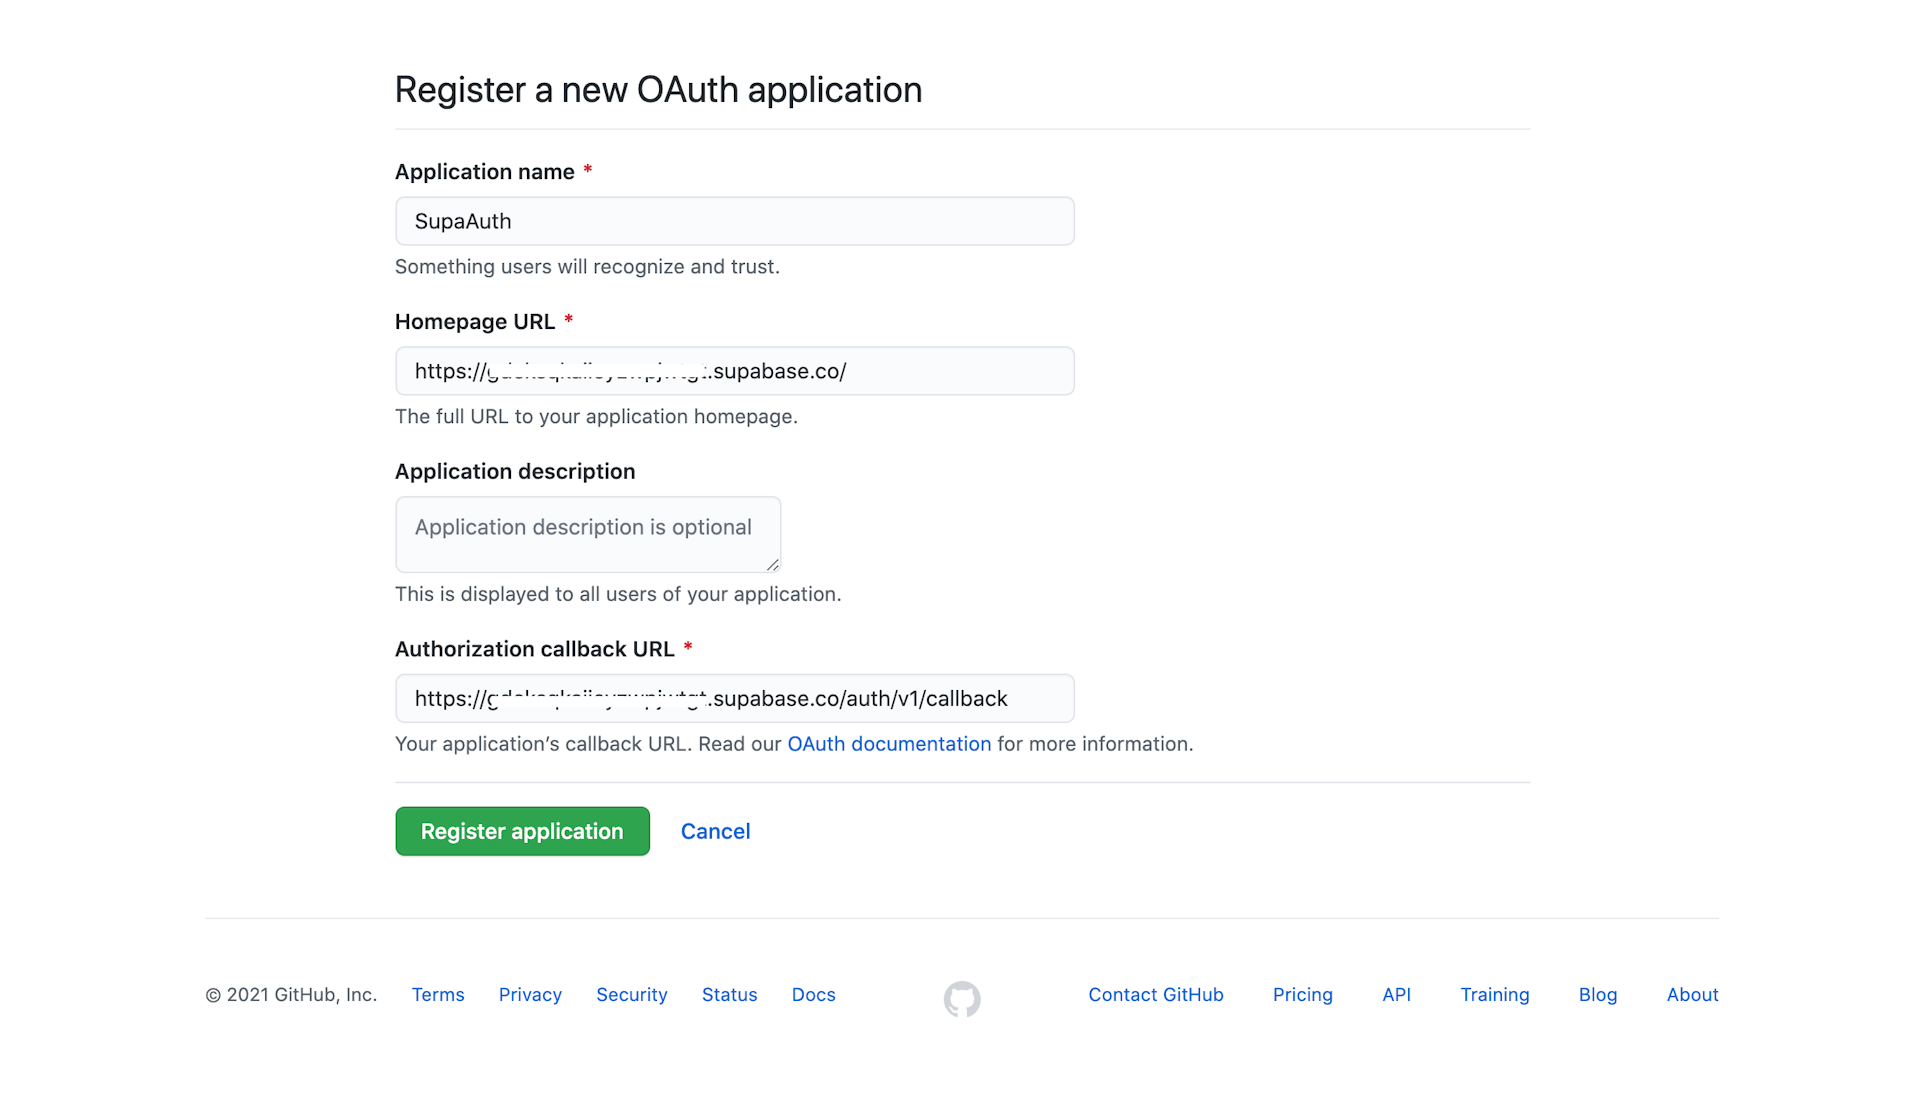
Authorization callback URI should be of the form https://<your-project>.supabase.co/auth/v1/callback on provider dashboard.
Once done copy the Client Id and Client Secret from the app you just created. We'd be needing it to configure Github as the 3rd party provider in Supabase's Auth Setting page.
Configure Github as 3rd-Party Auth Provider
Visit https://app.supabase.io/project/your-project/auth/settings (Authentication -> Settings -> External OAuth Providers), enable Github, provide the Client Id and Client Secret for Github and save the changes.
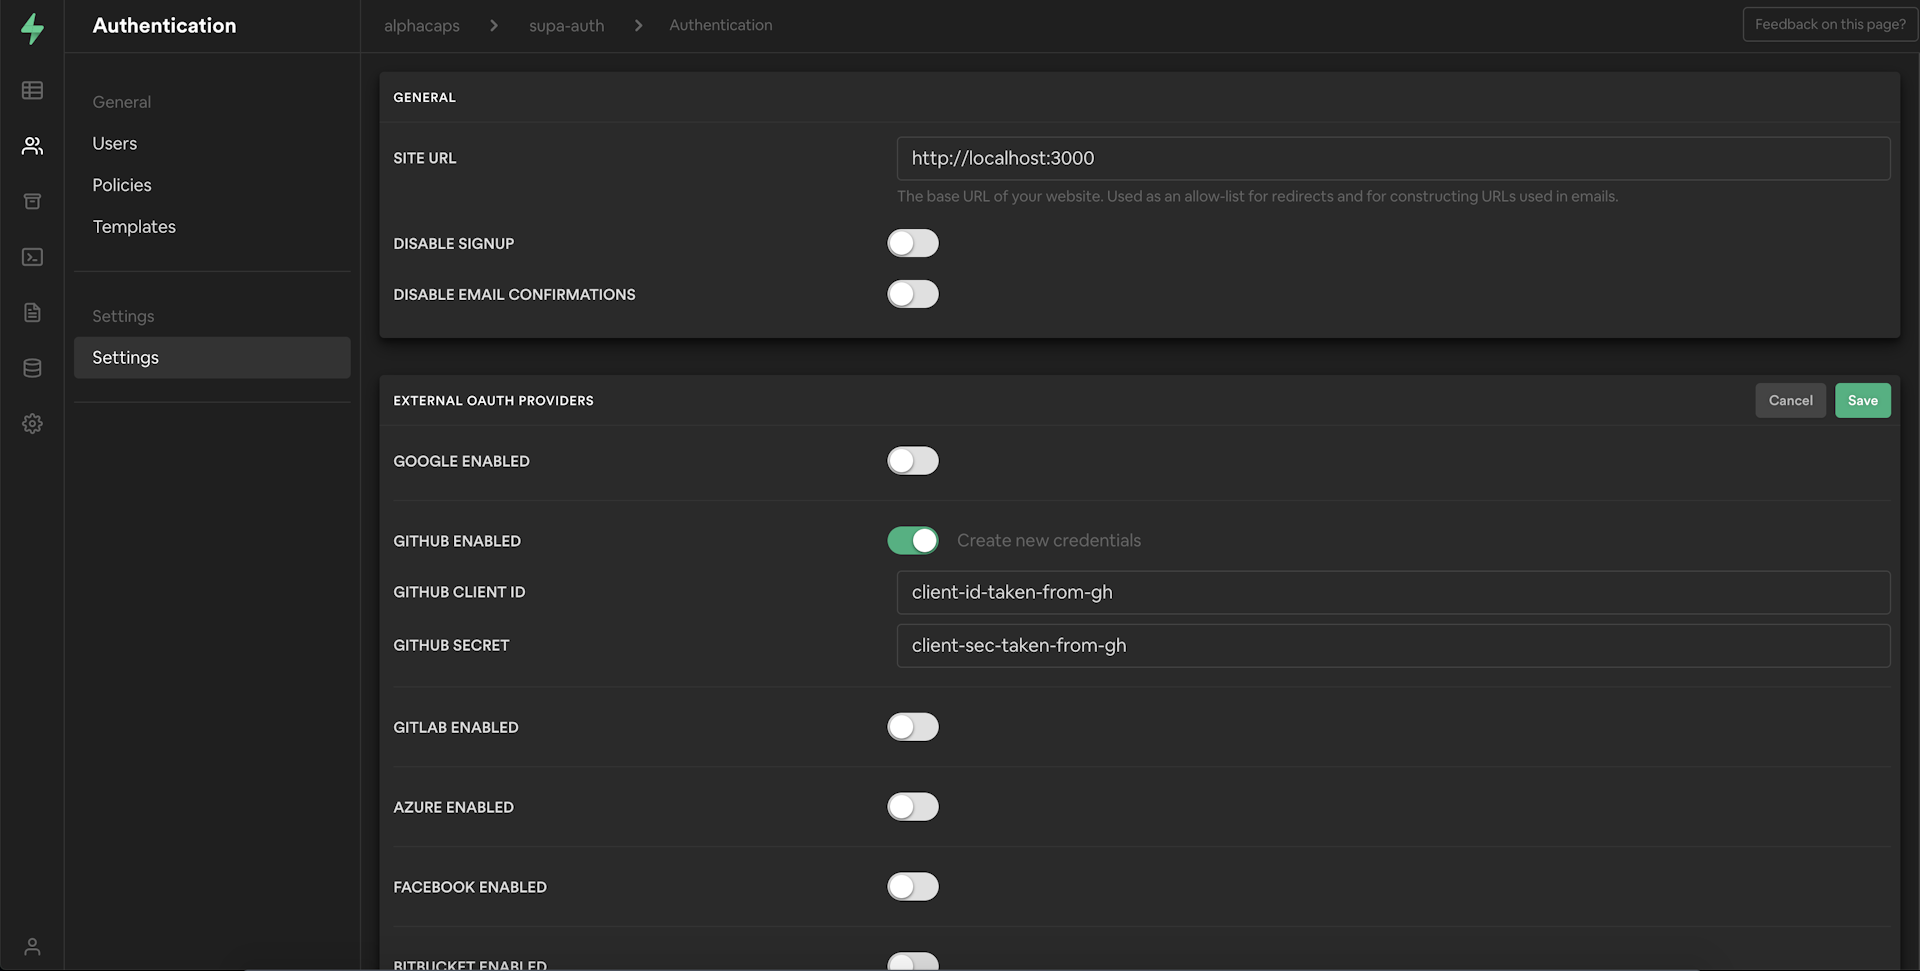
Supabase is configured now to consider Github as a valid auth provider.
Sign in with Github
The sign-in method we visited earlier takes an additional parameter called provider that takes any of the following values to decide the third-party provider to use.
- github
- gitlab
- azure
- bitbucket
For example, for Github login, the supabase.auth.signIn method will take github as the provider like
const { user, session, error } = await supabase.auth.signIn({
  // provider can be 'github', 'google', 'gitlab', 'bitbucket', etc.
  provider: 'github'
})
Let's create a dedicated function for Github log-in using the above method, and update AuthContext.tsx with the following changes -
export type AuthContextProps = {
    // ...what we already shared
    signInWithGithub: () => void,
    // ...what we already shared
}

// pre-existing code

const signInWithGithub = async (evt) => {
    evt.preventDefault()
    await supabase.auth.signIn({ provider: 'github'})
}
// pre-existing code

return (<AuthContext.Provider value={{
                // ...what we already shared
                signInWithGithub,
                // ...what we already shared
            }}>
            {children}
        </AuthContext.Provider>
    )

// pre-existing code
Once done, open index.tsx and carry out the following updates
// import `FaGithub` icon
import { /* other previous imports */, FaGithub } from 'react-icons/fa'

const {
    // previously used functions/values
     , signInWithGithub
} = useAuth()

// and, add the following mark-up right above the e-mail field

<button onClick={signInWithGithub} className="flex-1 bg-gray-200 text-green-700 py-3 rounded w-full text-center shadow">
    <FaGithub className="inline-block text-2xl"/> {isSignIn ? 'Log In' : 'Sign Up' } with <strong>Github</strong>
</button>
<hr className="my-4"/>
With the above changes, the page should look like -
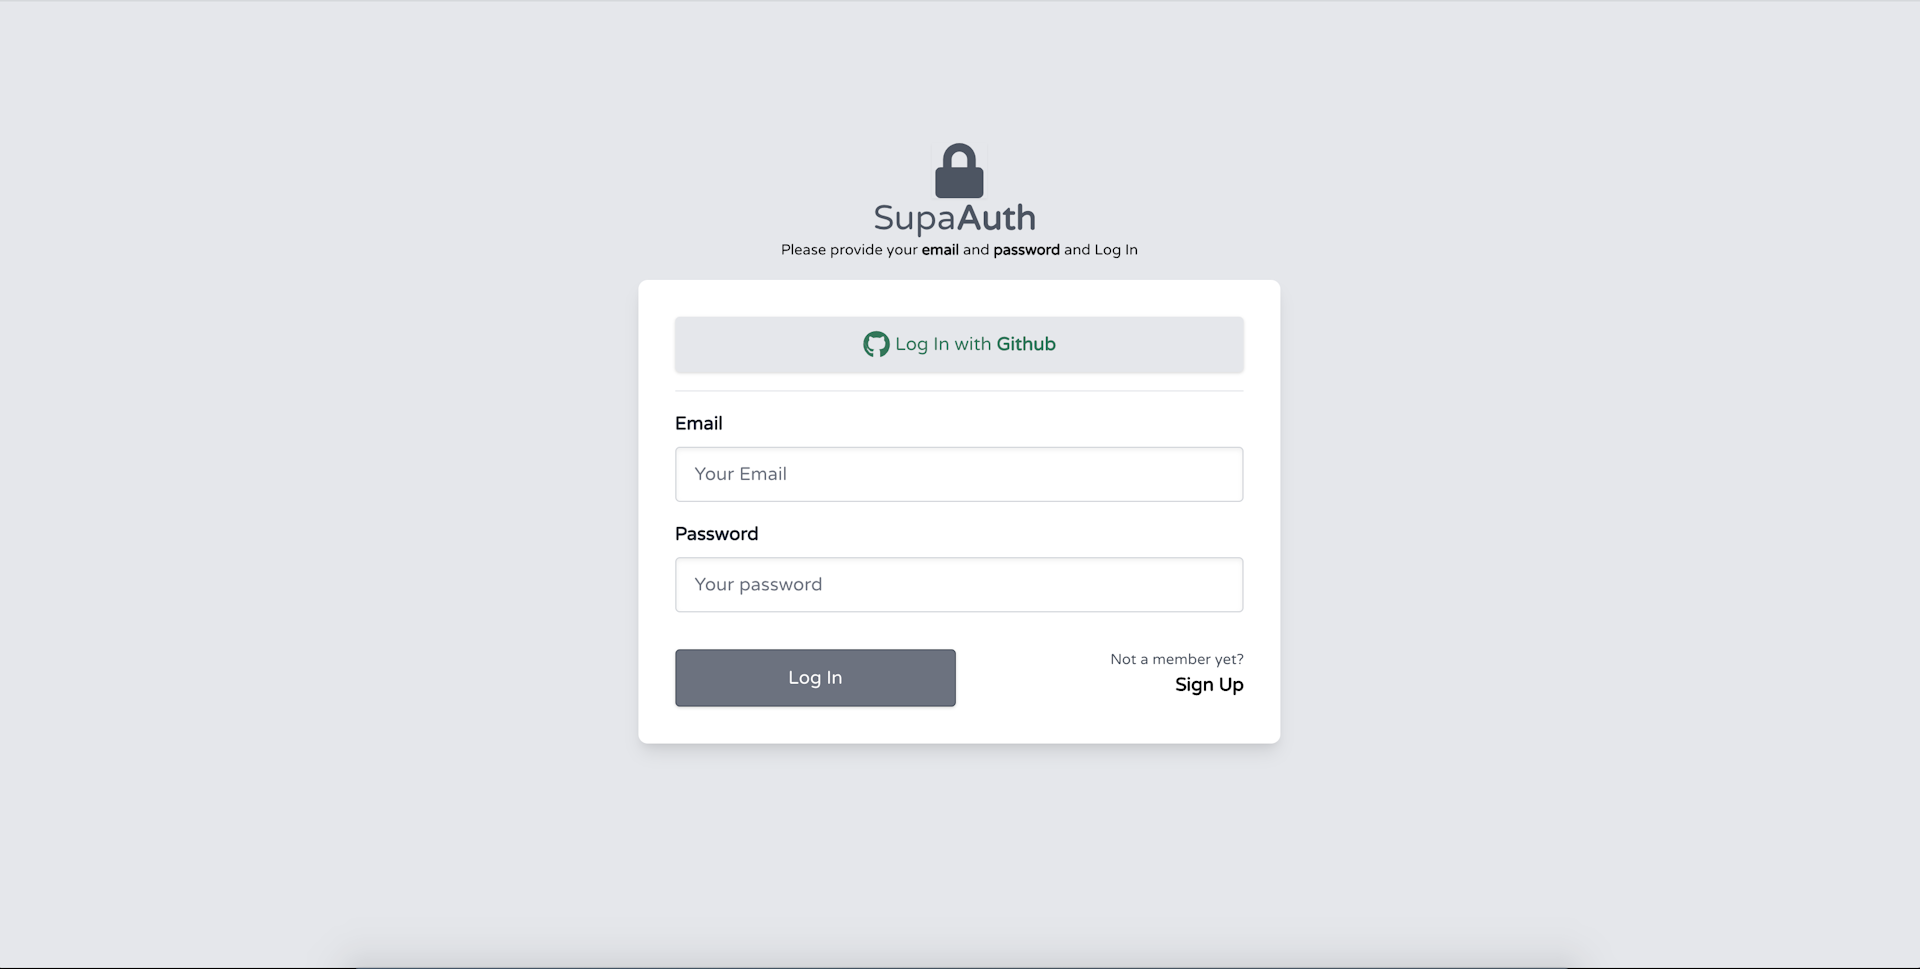
Time to see our updates in action now.
Open http://localhost:3000, click on the Login with Github link and you should be able to authenticate yourself(post allowing the Github app). The success page defaults to http://localhost:3000, and once you allow, you get redirected to the Supabase app first and then to your default application's URL in an authenticated state.
While doing a 3rd party login it's common to redirect your users to a special/specific page. You can do the same by
const { user, session, error } = await supabase.auth.signIn({
  provider: 'github'
}, {
  redirectTo: 'https://example.com/welcome'
})
- the base domain must be the same as the domain in your Auth settings
You can sign In with scopes too
const { user, session, error } = await supabase.auth.signIn({
  provider: 'github'
}, {
  scopes: 'repo gist notifications'
})
const oAuthToken = session.provider_token // use to access provider API
Other providers can also be configured similarly by registering the apps in their platform-specific ways and configuring Supabase to use the details.
An even simpler login system
Although 3rd party login simplifies and takes a lot of pain out of quickly authenticating your users, you'd be amazed to see that there's an even simpler way to log in to your users.
And that too by not requiring addition, but the subtraction of code. We'll be needed to, not need the user password in the sign-in method we have used previously.
Magic Links with Supabase
Remember the supabase.auth.signIn method we've used for email/password and 3rd part logins till now? The same method, If you don't provide the password will send a magic link on your users' email which they can use to log in, and remain logged in for 1 hour.
const { user, session, error } = await supabase.auth.signIn({
  email: 'example@email.com'
})
Let's tweak our login page a bit. Make password a non-required field, and update the placeholder to Your password. Leave empty for password-less login suggesting that it would be okay to go ahead even without a password.
The SupabaseAuthPayload type should also be updated to reflect that the password field is optional.
export type SupabaseAuthPayload = {
    email: string,
    password?: string
}
Let's check if it works now.
Upon hitting the login button with just your email filled, you should receive the magic link in your provided email. Clicking on the link will lead you to the default landing page in authenticated state.
Add support for magic link
Few things to keep in mind
- Your/Your user's account must be an activated account for the magic links to work.
- magic link's destination URL is determined by the SITE_URL config variable. To change this, you can go to Authentication -> Settings on app.supabase.io
Concluding Thoughts
Supabase makes it supa-easy to write an authentication layer for any application. The surface area for the auth APIs is very small, with single methods expressively and sufficiently supporting many login-related flows.
Throughout this series, we have covered what makes for the majority of the auth functions Supabase has to offer. There are few more auth functions we didn't play with like - resetting the password, or extended use cases like having more details than an email/password while registering the users(or allowing them to do that in later updates). The first one should be a very trivial work to introduce in the current structure and I leave that as an exercise, the second one requires an understanding of the Supabase's CRUD APIs and modifiers.
Since authentication is foundational to any rock-solid app I considered covering it first, and before we get supa-domain-ish. And as it's done now to a good extent, I think we're in a good position to explore Supabase's CRUD APIs.
Supabase's CRUD API and modifier are going to be the subject of my future series. We'll follow a style similar to this series, and we'll build something cool over the very structure we're concluding this series with — Incrementally learning and applying the methods Supabase has to offer, to help deliver on persistence and real-time requirements.
See ya in the next one!
Let me know on Twitter, if you were looking forward to see few other things(related to authentication), and I'd try to cover them in future articles.
Thank you for being till the end 🙌 . If you enjoyed this article, or learned something new, please take a second to tweet this article or share on LinkedIn so others can discover it. Or add to the discussion on Twitter.