Author your Astro site's content with Git-based CMSs


15 min read • –––

If you've followed the Learn Astro series, you'd have an Astro site already up and running at Vercel. We concluded with a good, crisp, blog setup and also learned Astro in the process. However, there's one aspect that still feels a bit non-intuitive. We author our content by hand in editors that could support markdown, which could be a bit clumsy. Plus, missing any important front-matter tags could lead to unexpected results. There should be a better way to do this. In this article, we'll cover how we can manage the markdown content like a pro with open-source, headless, Git-based CMS - Netlify CMS.
What's a Git-based CMS?
A Git-based CMS is your day-to-day CMS with just a slight twist - Git as the data source and content manager. Unlike the traditional CMSs that persist your changes in a database, Git-based CMSs are headless and let you
When it comes to Git-based or JAMStack CMSs in the market NetlifyCMS and Forestry(or TinaCMS) are two of the most popular CMS that can go with git-based content.
NetlifyCMS, by Netlify - the JAMStack Stack provider, is fully open-source, has a good basic experience, and plays well with the overall Netlify suite of tools. The only requirement, I've found with Ink, is that the site must be hosted on Netlify.
Forestry is also pretty good and has more superior content editing experience but you'd be able to work with only a limited amount of sites in the free plan. Config for your CMS is still stored in Github, but Forestry's experience is more controlled.
For the current article, we'll use NetlifyCMS as the CMS of our choice.
Deploy Ink to Netlify
Although not necessary, NetlifyCMS uses certain features that are Netlify-native. Wouldn't it be good if the deployment pipeline is also Netlify-native? Let's go ahead and set up our site on Netlify. Head on over to the site, and use your Github account to signup with Netlify.
Once Signed-up/Signed-in you should land on the Netlify dashboard

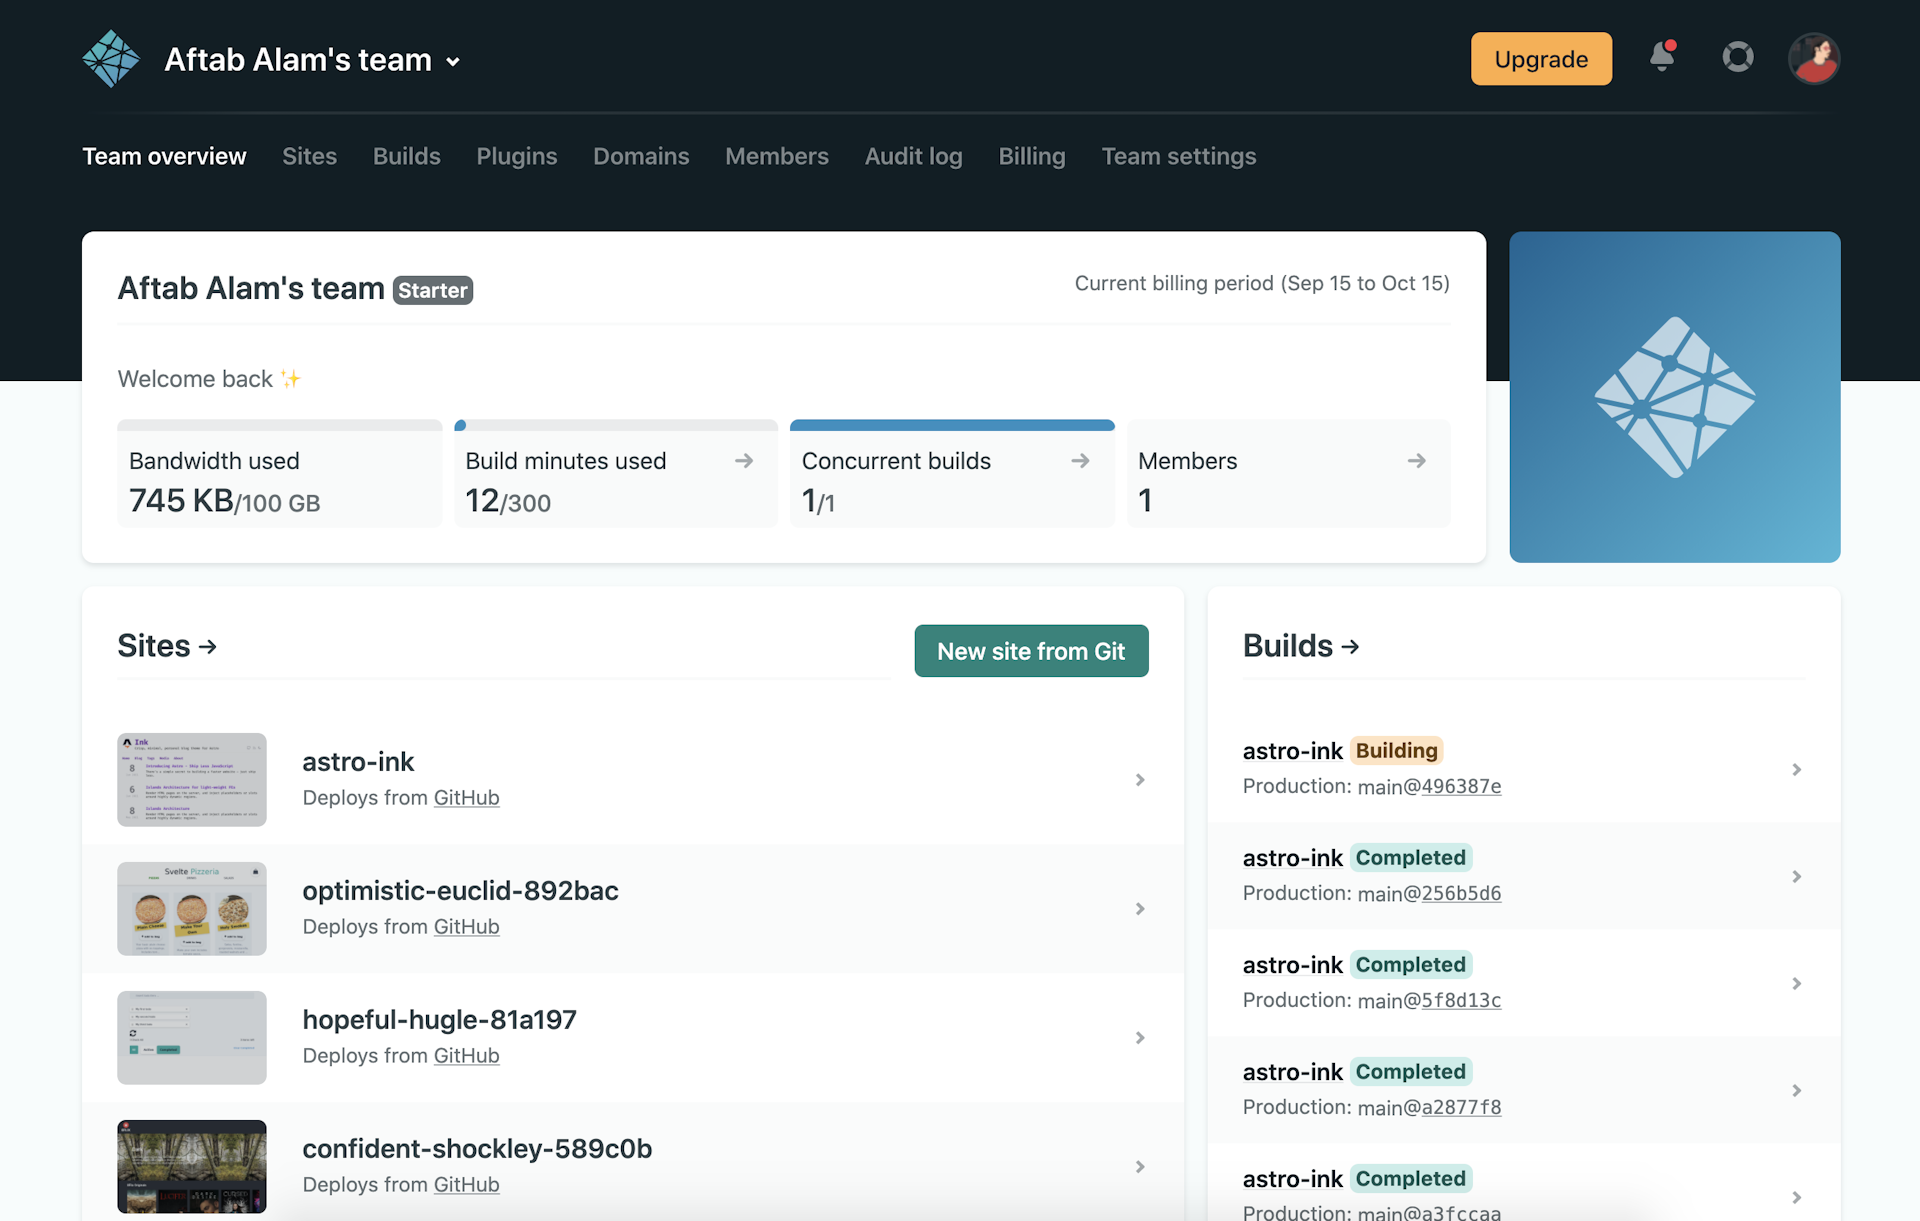
Click on the "New Site from Git" to connect Github, and configure a site to work with Netlify

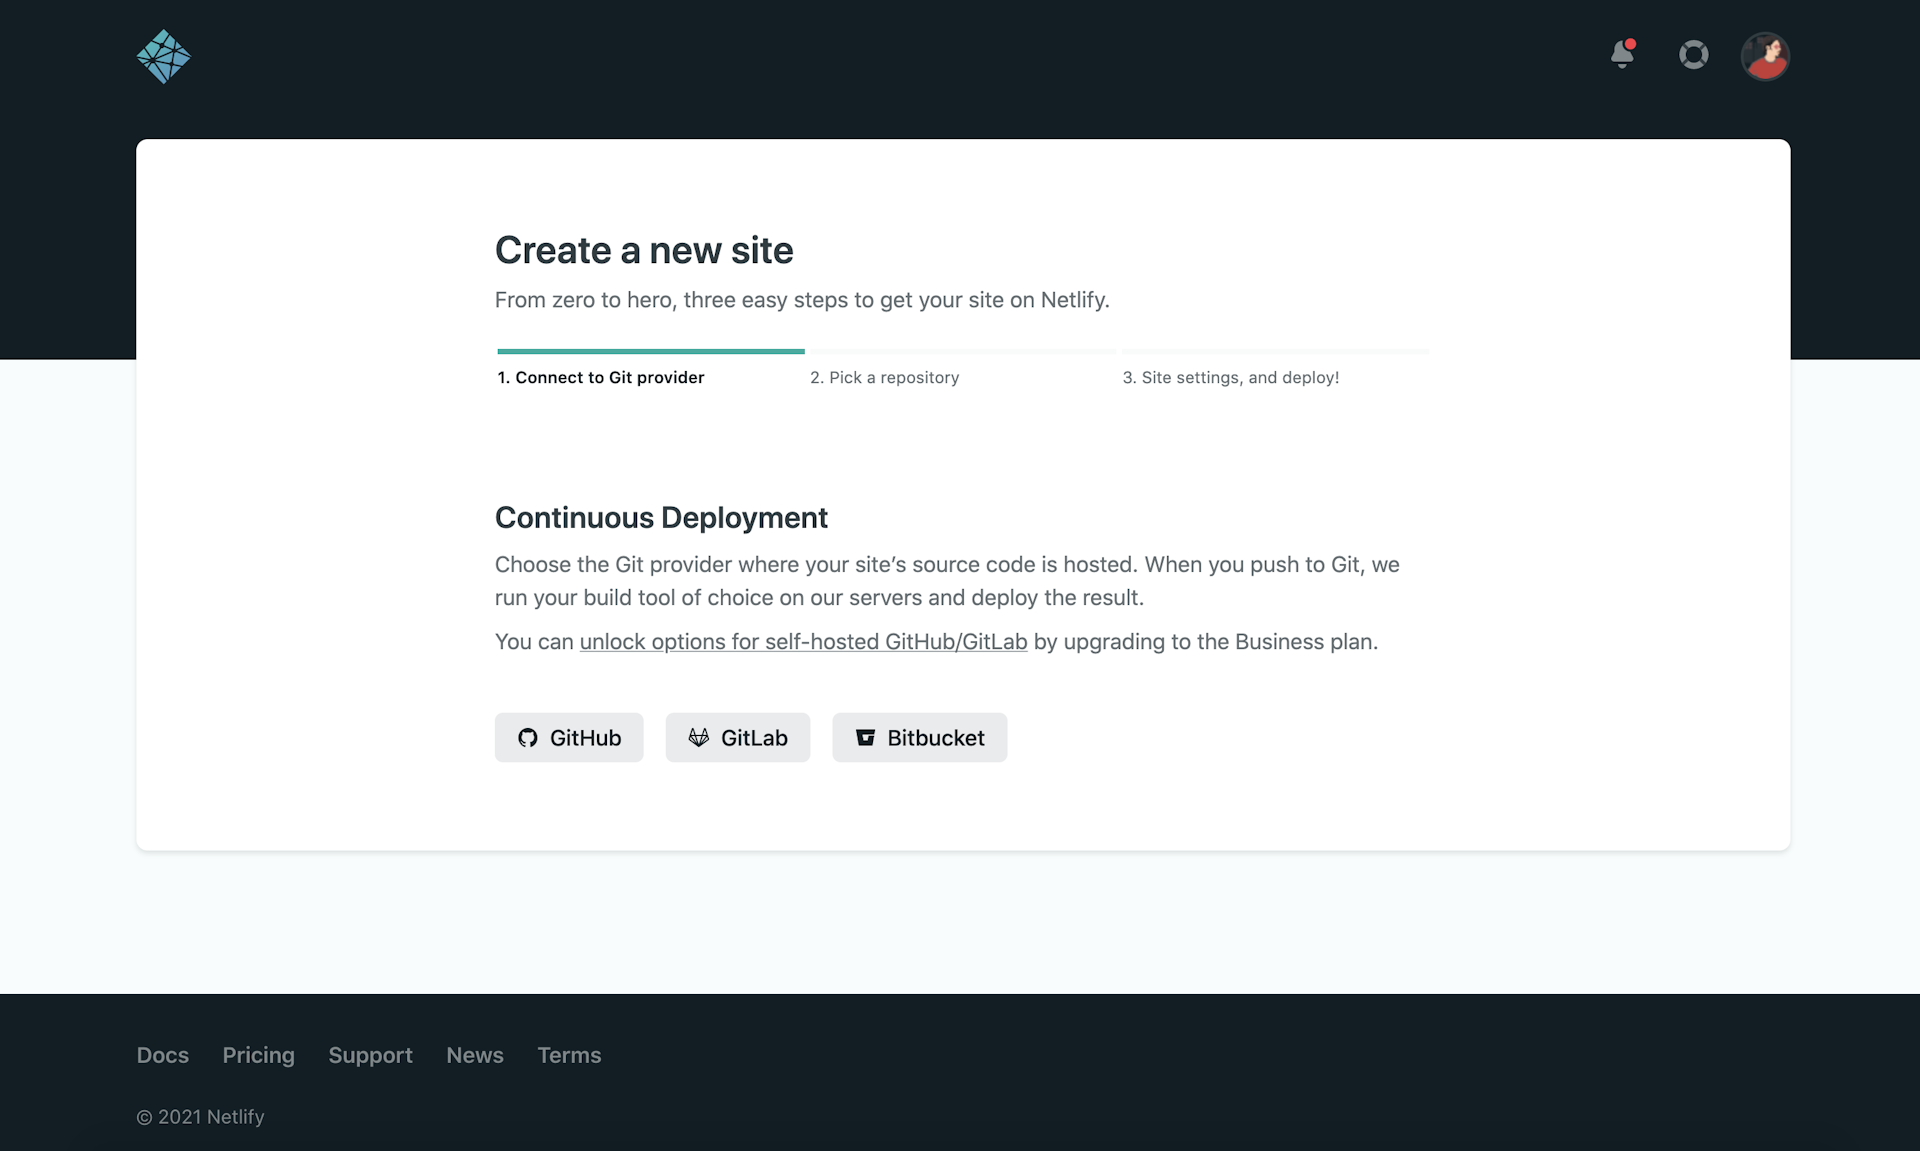
Press Github, and choose [your-gh-username]/[repo-name] from the list of repository it presents. For us, it should be [your-gh-username]/astro-ink if you're working with a cloned template or fork of astro-ink.
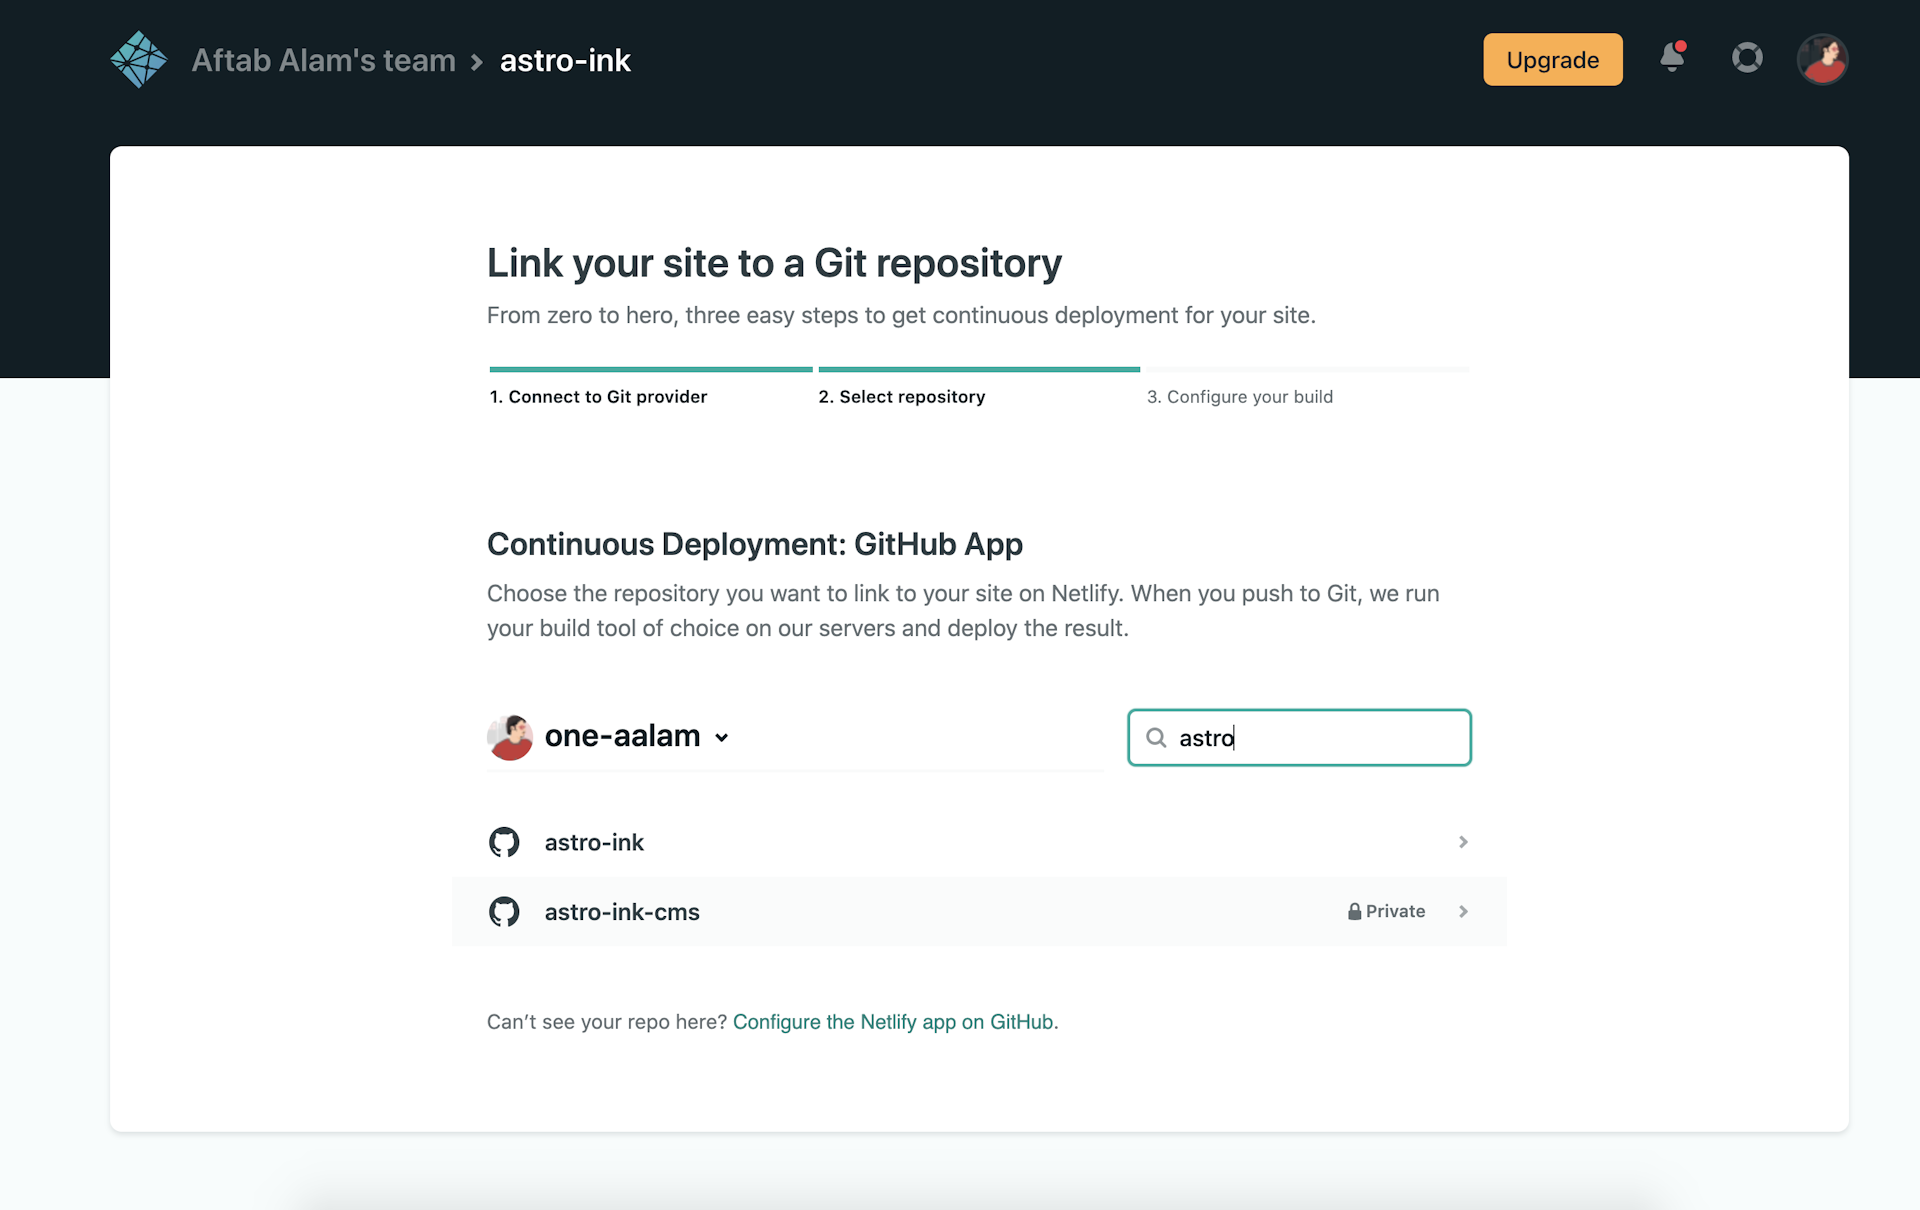
Netlify must have access to list your repositories for this to work. You can provide full access or configure it on a per-site basis.
Once you've connected to github and picked the repository, configure the build settings as per your SSG. By default, Netlify picks the public directory for SSG-generated content, but since Astro prefers a dist directory for the same, you should change the publish directory to /dist. The command to build must be yarn build
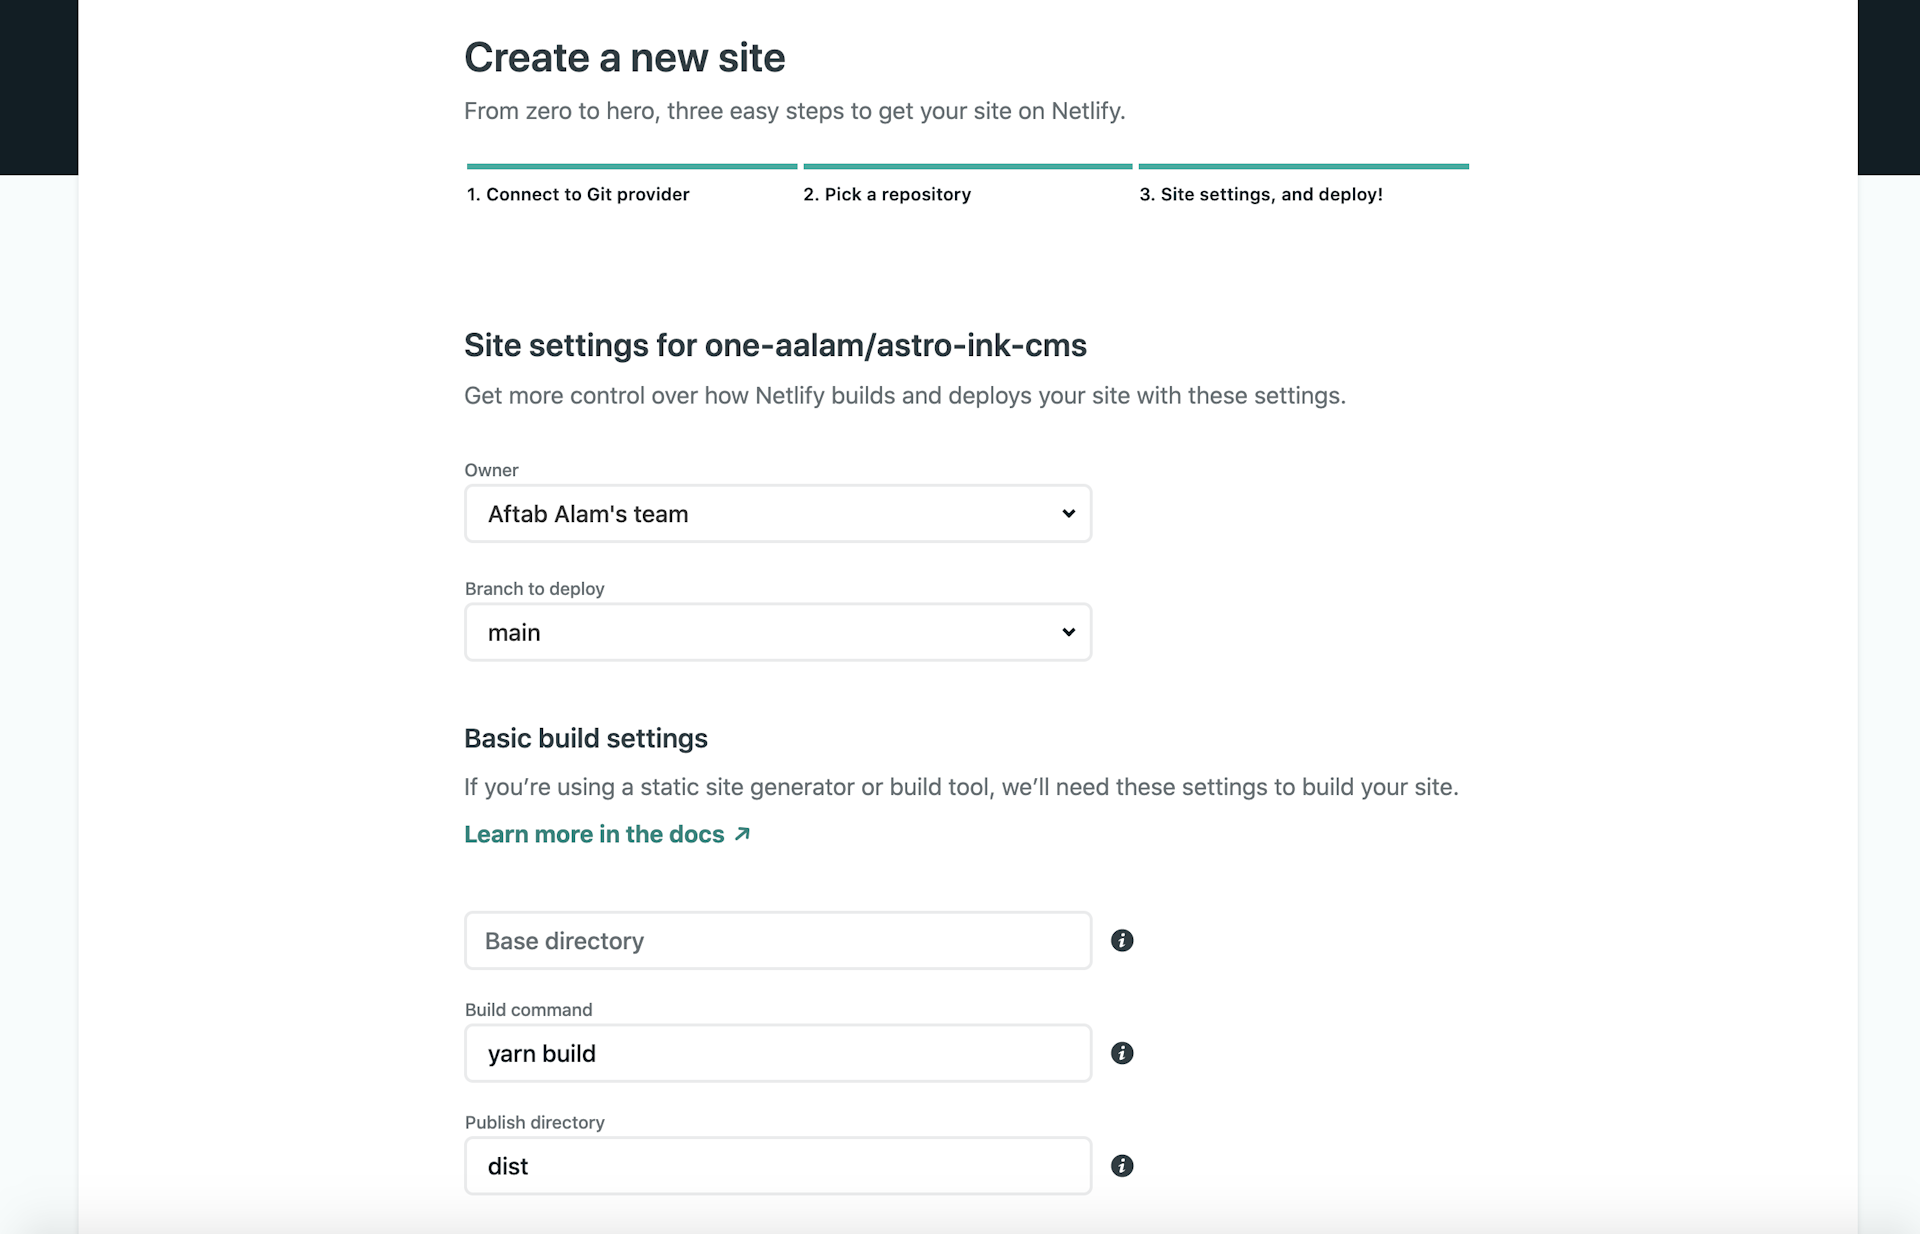
Once done, click on the "Deploy" button.
Netlify will take you to the project dashboard, where you can see your site deployment in progress. Once done, you should see a random-app-name.netlify.com available.
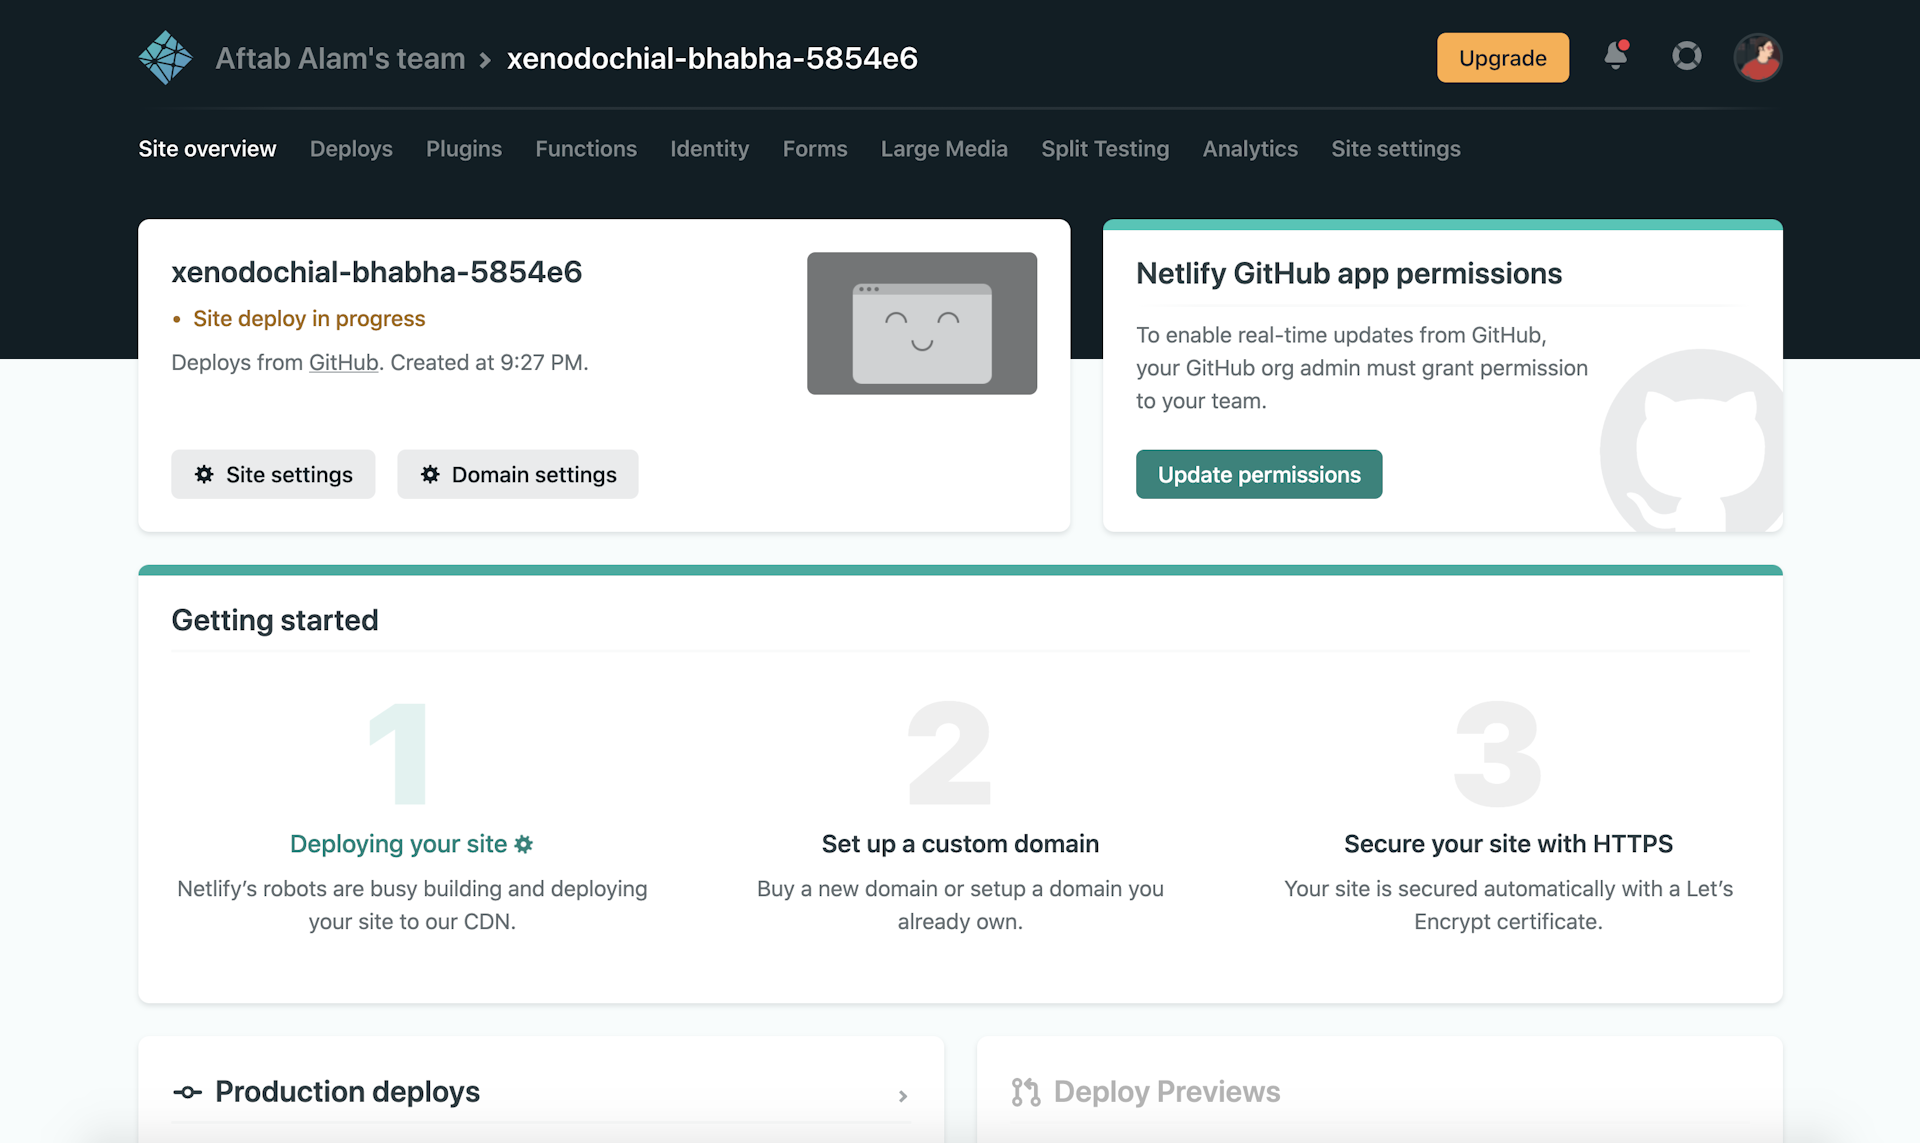
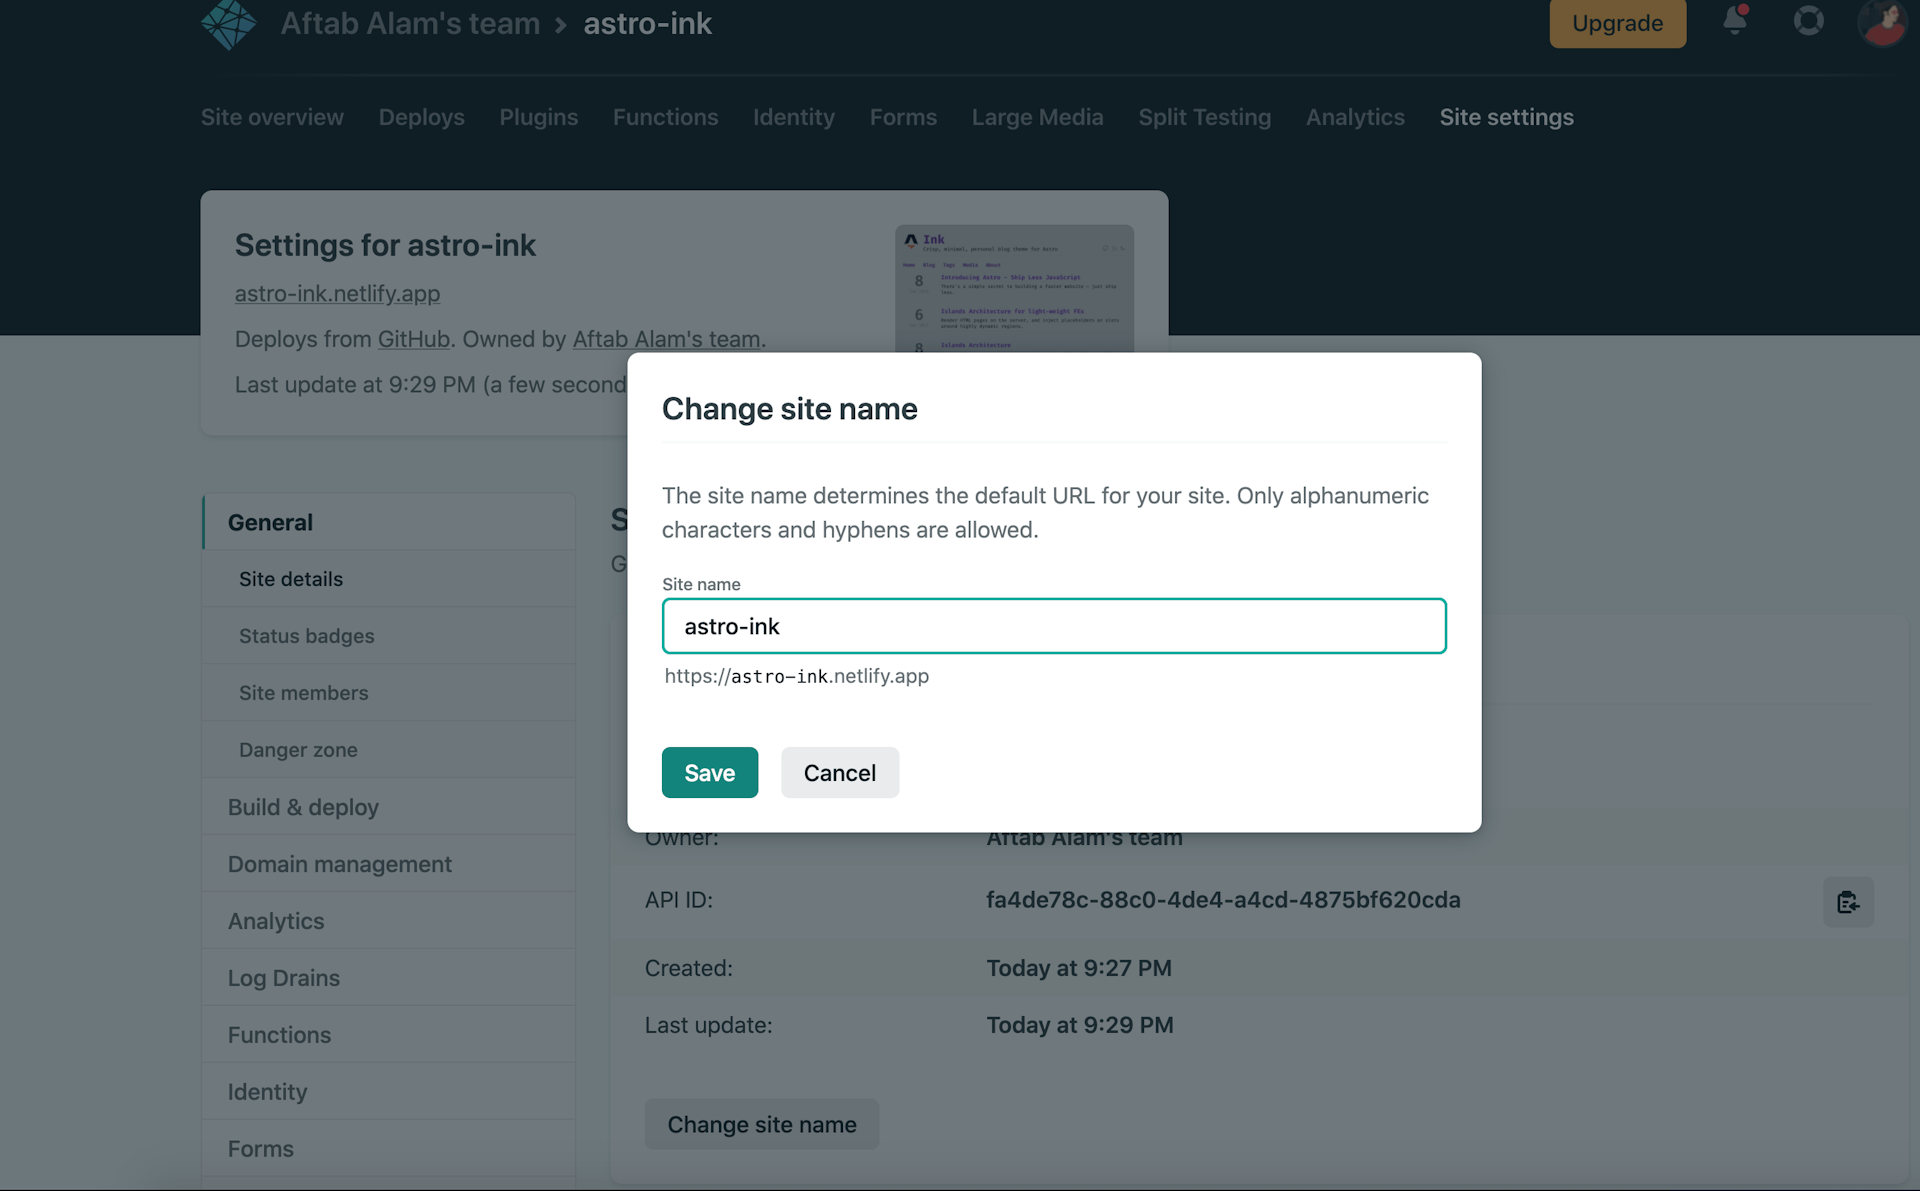
Your app's hosted now on Netlify. If you want you can change the random name to something more appropriate like astro-ink.netlify.com.
Let's configure the Netlify CMS
NetlifyCMS is a React SPA fundamentally. To make it work, you need to link the CMS file from the CDN and make the index.html that hosts it available in the public directory of your SSG, alongside other public assets you serve.
For us, /public is the directory Astro uses to host static, non-generated, assets. We'll use the same to host the NetlifyCMS.
Setup NetlifyCMS
Let's consider that We eventually want the NetlifyCMS/CMS to be available at astro-ink.netlify.com/admin. For this to work, we'll go into the public directory and create a folder called admin.
Within the admin directory we first need the index.html file that will render the NetlifyCMS when the author will visit astro-ink.netlify.com/admin
Create an index.html file and place the following content
<!DOCTYPE html>
<html>
  <head>
    <meta charset="utf-8" />
    <meta name="viewport" content="width=device-width, initial-scale=1.0" />
    <title>Astro Ink - Content Manager</title>
  </head>
  <body>
    <script src="https://unpkg.com/netlify-cms@2.10.161/dist/netlify-cms.js"></script>
  </body>
</html>
This will include the netlify-cms scripts that manage the rendering for NetlifyCMS.
Configure NetlifyCMS
With the script included, now we need to tell Netlify about our CMS configuration and where to find it.
Create a config.toml(a variant of .yml) and put the following
backend:
  name: git-gateway
  branch: main
This tells NetlifyCMS to use the git gateway and the main branch to push the commits.
Netlify CI/CD is pre-configured to build your site with every commit and this behavior is at the center of content editing with a Git CMS. Every change you do in a Git-based CMS pushes a new commit to your repo, which triggers a rebuild of your site. Here we're configuring Netlify to use the main branch for all the commits.
Configure the Content types
With the CMS setup, the next thing to do is to configure the content types we'll allow our users to create and update. With NetlifyCMS we manage the configuration in the same Github repository's config.toml file we just updated for Git in the previous step. Go ahead and add the following changes.
collections: # A list of collections the CMS should be able to edit
  - name: 'post' # Used in routes, ie.: /admin/collections/:slug/edit
    label: 'Post' # Used in the UI, ie.: "New Post"
    folder: 'src/pages/blog' # The path to the folder where the documents are stored
    create: true # Allow users to create new documents in this collection
    fields: # The fields each document in this collection have
      - {label: "Layout", name: "layout", widget: "hidden", default: "$/layouts/post.astro"}
      - { label: 'Title', name: 'title', widget: 'string' }
      - { label: 'Description', name: 'description', widget: 'text' }
      - { label: 'Body', name: 'body', widget: 'markdown' }
      - { label: 'Tags', name: 'tags', widget: 'list' }
      - { label: 'Author', name: 'author', widget: 'string' }
      - { label: 'Author Twitter Handle', name: 'authorTwitter', widget: 'string' }
      - { label: 'Publish Date', name: 'date', widget: 'datetime' }
Here's what all the above settings mean to NetlifyCMS
collections- Collections are all the content types your CMS is configured to edit. For us, all the posts inside the/src/pages/blogfollowed the same front-matter structure being a blog with similar attribute requirements. Collections are the blueprints or classes for your content type. With new content types, you add new collections with all the config that makes them unique and that you'd like to edit.
There's just one post type we'd like to edit for our CMS, so we'll just add one entry named post under collections
name- The unique name the collection will be recognized by in the NetlifyCMS systemlabel- The label your collection will be recognized by in the UIfolder- The location in your Github repo where all your markdown files will be kept. Sincesrc/pages/blogis the folder, we've used to keep the hand-edited markdown file and our blogs are available atsite/blog/[slug], we'll usesrc/pages/blogas the folder.create- boolean value to inform NetlifyCMS if creation is allowedfields- fields configures all the fields that we'd prefer to be editable in the NetlifyCMS. They can be directly mapped to the front-matter details we're maintaining with*.mdfile, and the UI controls that are more appropriate to edit it conveniently.
Since we had the following front-matter structure
---
layout: $/layouts/post.astro
title: Introducing Astro - Ship Less JavaScript
date: 2021-06-08
author: Fred K. Schott
authorTwitter: FredKSchott
category: design
tags:
- Astro
- jam-stack
description: There's a simple secret to building a faster website — just ship less.
---
it could get translated to
- {label: "Layout", name: "layout", widget: "hidden", default: "$/layouts/post.astro"}
    - { label: 'Title', name: 'title', widget: 'string' }
    - { label: 'Description', name: 'description', widget: 'text' }
    - { label: 'Body', name: 'body', widget: 'markdown' }
    - { label: 'Tags', name: 'tags', widget: 'list' }
    - { label: 'Author', name: 'author', widget: 'string' }
    - { label: 'Author Twitter Handle', name: 'authorTwitter', widget: 'string' }
    - { label: 'Publish Date', name: 'date', widget: 'datetime' }
in config.yml. As learned earlier, name is for NetlifyCMS and label is for you. widget is what controls what UI element needs to be rendered in NetlifyCMS for each field you configure. NetlifyCMS supports a wide range of widgets you can use here to render a control as you prefer. You can even create your own custom widgets if you want.
With the above changes, the config.yml file should look like
backend:
  name: git-gateway
  branch: main

collections: # A list of collections the CMS should be able to edit
  - name: 'post' # Used in routes, ie.: /admin/collections/:slug/edit
    label: 'Post' # Used in the UI, ie.: "New Post"
    folder: 'src/pages/blog' # The path to the folder where the documents are stored
    create: true # Allow users to create new documents in this collection
    fields: # The fields each document in this collection have
      - {label: "Layout", name: "layout", widget: "hidden", default: "$/layouts/post.astro"}
      - { label: 'Title', name: 'title', widget: 'string' }
      - { label: 'Description', name: 'description', widget: 'text' }
      - { label: 'Body', name: 'body', widget: 'markdown' }
      - { label: 'Tags', name: 'tags', widget: 'list' }
      - { label: 'Author', name: 'author', widget: 'string' }
      - { label: 'Author Twitter Handle', name: 'authorTwitter', widget: 'string' }
      - { label: 'Publish Date', name: 'date', widget: 'datetime' }
Pay attention to the layout field. It's necessary to register it as a hidden field so that program-level concerns can be hidden from the author's eye, and accidental, unintended mistakes can be prevented.
Configure NetlifyCMS for media uploads
textual content would not be the only format authors would use. We may add images to our posts. To support images, we'll have to tell NetlifyCMS where it can upload/find images with
media_folder: 'public/images/uploads' # Folder where user uploaded files should go
public_folder: '/images/uploads'
media_folder- Where should the user uploaded files go?public_folder- The location to use to link the user uploaded files.
The resultant config.yml should look like
backend:
  name: git-gateway
  branch: main

media_folder: 'public/images/uploads' # Folder where user uploaded files should go
public_folder: '/images/uploads'

collections: # A list of collections the CMS should be able to edit
  - name: 'post' # Used in routes, ie.: /admin/collections/:slug/edit
    label: 'Post' # Used in the UI, ie.: "New Post"
    folder: 'src/pages/blog' # The path to the folder where the documents are stored
    create: true # Allow users to create new documents in this collection
    fields: # The fields each document in this collection have
      - {label: "Layout", name: "layout", widget: "hidden", default: "$/layouts/post.astro"}
      - { label: 'Title', name: 'title', widget: 'string' }
      - { label: 'Description', name: 'description', widget: 'text' }
      - { label: 'Body', name: 'body', widget: 'markdown' }
      - { label: 'Tags', name: 'tags', widget: 'list' }
      - { label: 'Author', name: 'author', widget: 'string' }
      - { label: 'Author Twitter Handle', name: 'authorTwitter', widget: 'string' }
      - { label: 'Publish Date', name: 'date', widget: 'datetime' }
With all the above changes done, let's push our changes to Github.
git add .
git commit -m "feat: Add Netlify CMS Admin"
git push
Configure Netlify for Authentication and Git Backend
CMS configuration is just one part of the CMS story. For your users to log in to your site with their Git credentials you'll require a way to identify/authorize them. Netlify Identity is Netlify's answer to browser-based user authentication, and configuring it with Netlify is utterly simple. Being Netlify's own, It's also just a click away in the Netlify dashboard.
In your Netlify dashboard click your site settings -> https://app.netlify.com/sites/[your-ink-clone]/settings/general and then click on Identity https://app.netlify.com/sites/[your-ink-clone]/settings/identity. Under the Identity section click on Enable Identity.
For registration preferences https://app.netlify.com/sites/astro-ink/settings/identity#registration you can leave the Open radio button selected and click on Save
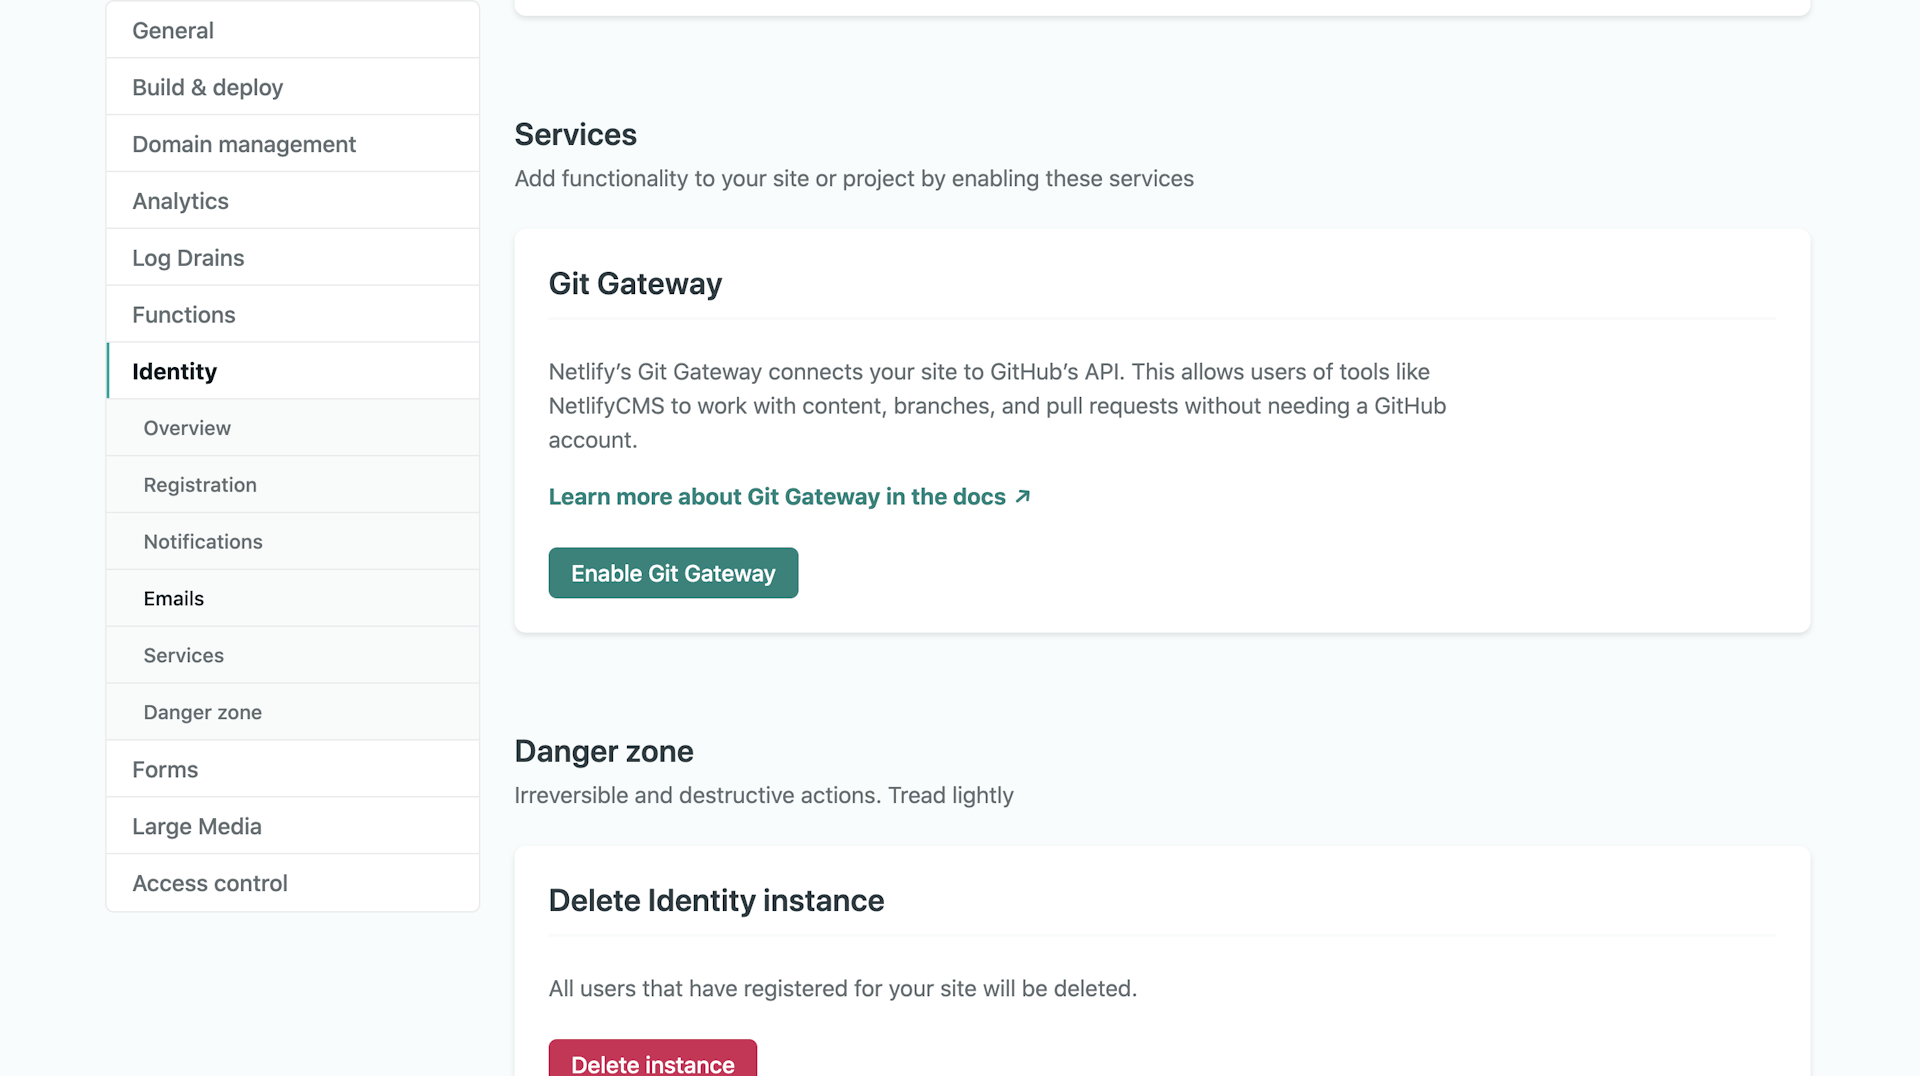
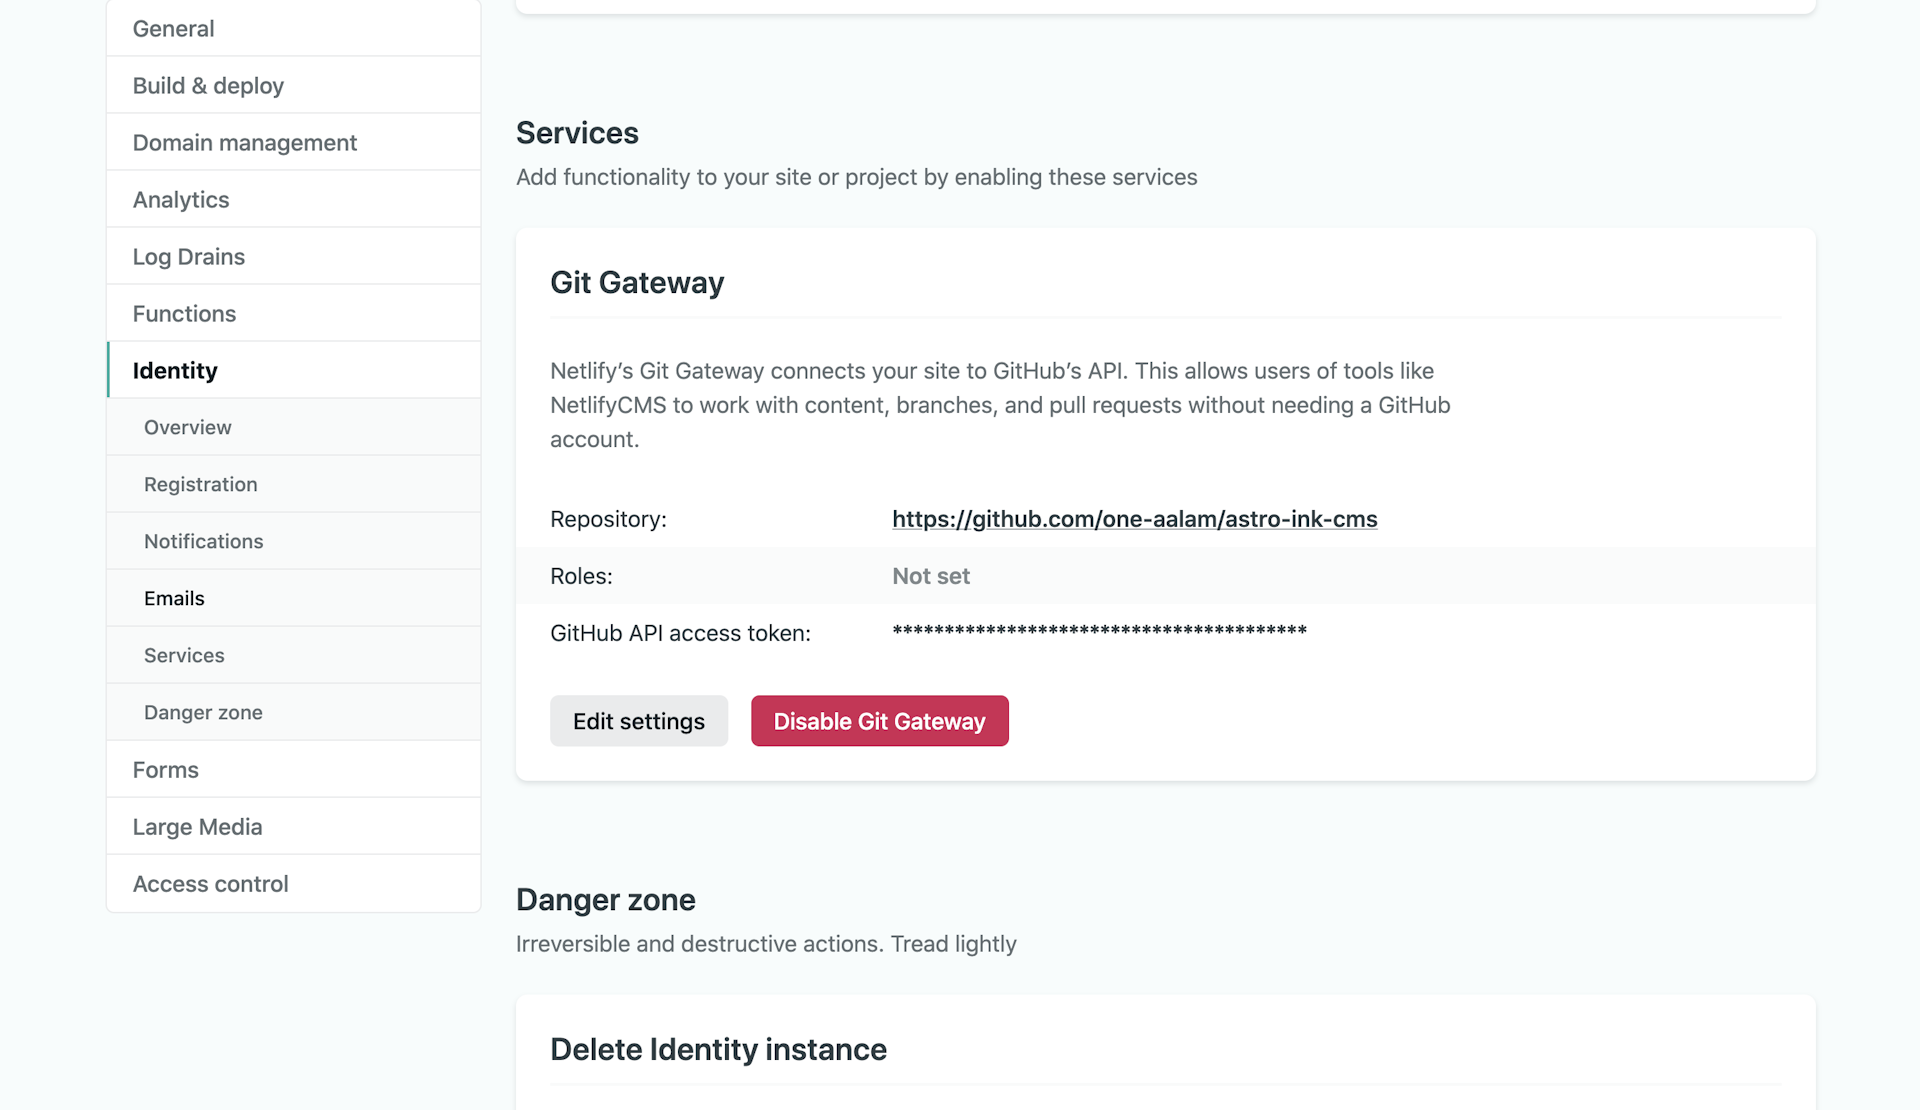
Enable Git Gateway
Under the identity section, scroll to Services https://app.netlify.com/sites/[your-ink-clone]/settings/identity#services and enable Git Gateway. This will enable the NetlifyCMS to work with Git as a backend.
Load/Initailize the Identity files
For Netlify Identity to work with your NetlifyCMS rendering page /admin/index.html we'll have to hook up the identity script
https://identity.netlify.com/v1/netlify-identity-widget.js
from the CDN in the head tag of public/admin/index.html
<!DOCTYPE html>
<html>
  <head>
    <meta charset="utf-8" />
    <meta name="viewport" content="width=device-width, initial-scale=1.0" />
    <title>Astro Ink - Content Manager</title>
    <script src="https://identity.netlify.com/v1/netlify-identity-widget.js"></script>
  </head>
  <body>
    <script src="https://unpkg.com/netlify-cms@2.10.161/dist/netlify-cms.js"></script>
  </body>
</html>
This covers the /admin relative URLs. To have Netlify Identity in action on all the site pages the same needs to be done on all the site pages. Open src/components/BaseHead.astro and add the following on line 64
<script src="https://identity.netlify.com/v1/netlify-identity-widget.js"></script>
One final change is redirecting the users to CMS Admin UI after successful login. For that, to work we'll be required a way to know Netlify Identity is available/initialized, as soon as the document is done loading, and redirect the users on successful login. Since we have an Astro site, and its hydration on JS behavior is opt-in we'll create a component to register this behavior that will get triggered on window load
<script lang="ts">
    import { onMount} from 'svelte'
    onMount(() => {
        if (window.netlifyIdentity) {
            window.netlifyIdentity.on('init', (user) => {
                if (!user) {
                    window.netlifyIdentity.on('login', () => {
                        document.location.href = '/admin/';
                    });
                }
            });
        }
    })
</script>
Open src/components/Footer.astro and include the above component
---
    import { SITE } from '$/config'
    import ModeLabel from './ModeLabel.svelte'
    import NetlifyIdentity from './NetlifyIdentity.svelte'
---
<div class="footer">
<nav class="nav">
<div>2021 © Copyright notice | <a href={ SITE.githubUrl } title={`${ SITE.name }'s Github URL'`}>{ SITE.name }</a>
<ModeLabel client:load/> theme on <a href="https://astro.build/">Astro</a></div>
<NetlifyIdentity client:load/>
</nav>
</div>
Now let's push our changes, and open the [your-site].netlify.app/admin to see the CMS in action.
Commit: https://github.com/one-aalam/astro-ink/commit/2b39e1519906162ec05abcadd2d08f8849961de2
Work with NelifyCMS
Click on the "Login with Netlify Identity" button, https://astro-ink.netlify.app/admin/#/
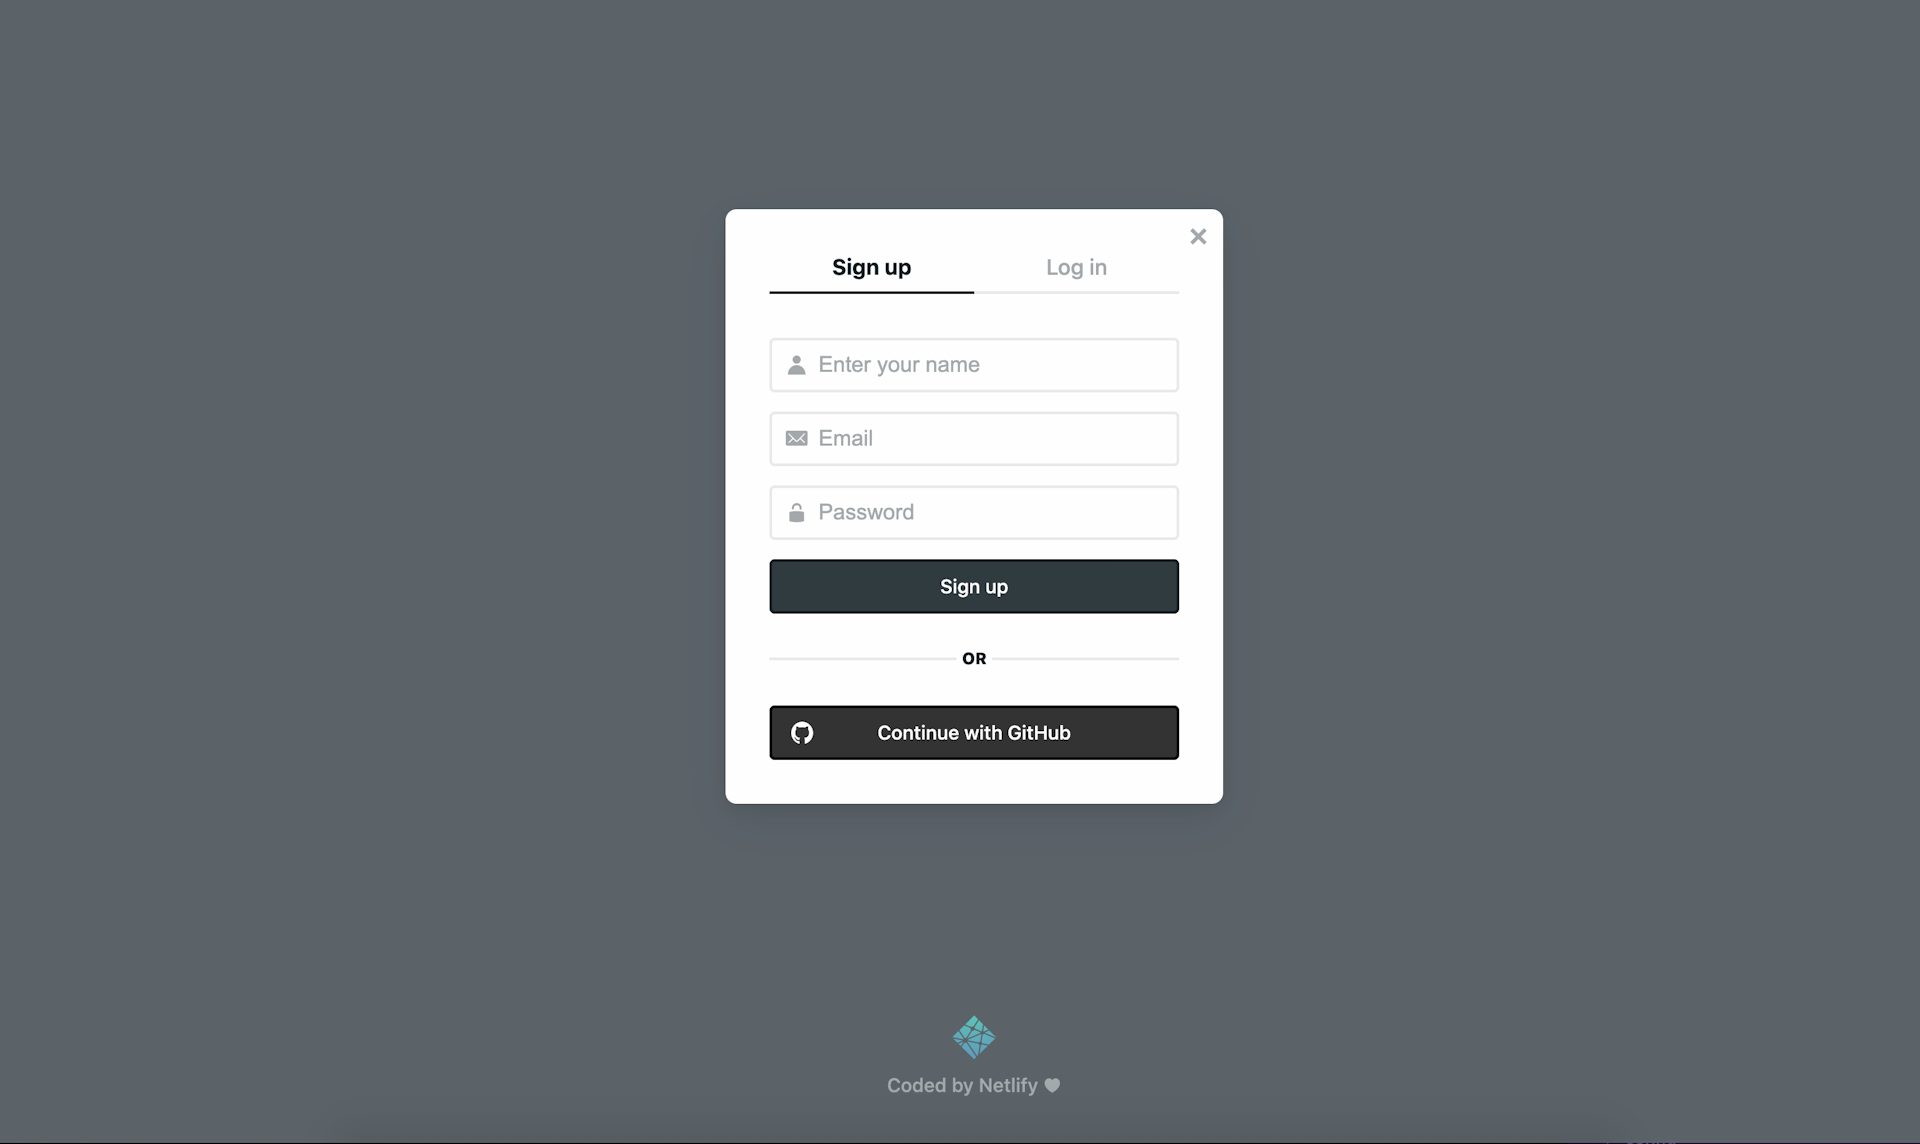
and sign-up with your actual details(name, email, password, etc.) or continue with Github credentials for the first time. Once signed up with basic credentials or Github, and the account is activated, use "Login" to visit the CMS dashboard in the subsequent visits.
You'll be landed to the default collections view post a successful login like https://astro-ink.netlify.app/admin/#/collections/post
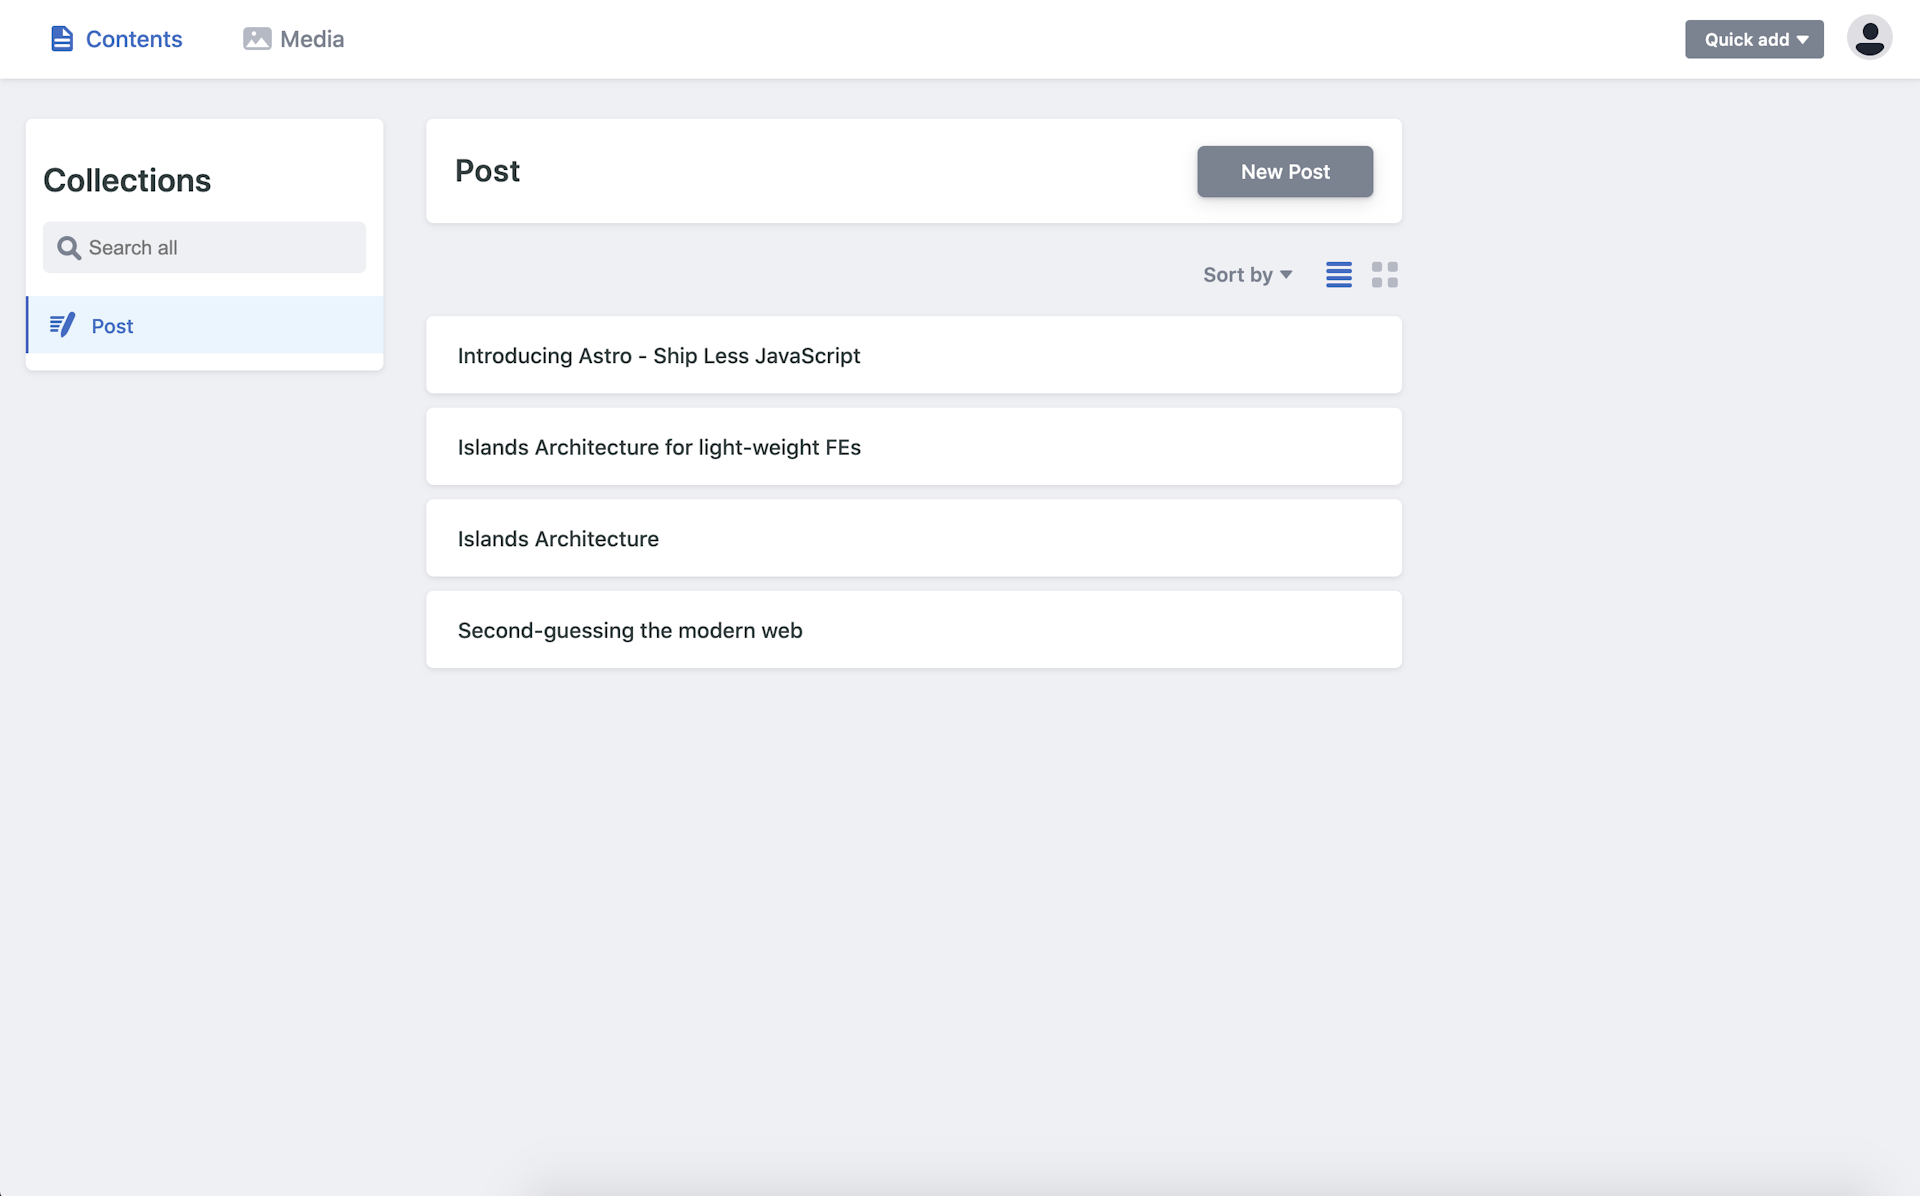
Where you can Edit the pre-existing posts, or create new posts and publish them. Go ahead and create/update/delete posts. Once done, click on "Publish" and choose one of the following options
- Publish now
- Publish and Create new
- Publish and duplicate
and see the NetlifyCMS sync the changes with your Github repo. Since Netlify CI is watching your Github repo for commits, it will re-build your site as soon as it finds a new commit with your content changes.
One important thing you must keep in mind is that the NetlifyCMS content-editing uses the same commit-based workflow you do to commit your code. Since the application code and content changes are inseparable, you'll have to keep your local changes always in sync with the remote repo to not have conflicts.
Conclusion
In this article, you got to learn about Git-based CMSs and Netlify. Git-based CMSs offer several benefits like -
- Simplicity of setup, configuration, and management
- version controlled goodness, without a complex pipeline or infrastructural requirements, and thus rolling back is easy
- No vendor lock-in as all content is present as flat files. You can use any tools that can work natively with Markdown. If you want you can additionally set up Forestry.io also, or any other Git CMS.
- Natural and homogenous to how we code. Use a tool, or don't use it you can still get quite done. Less lock-in leads to less hassles when migrating or changing authoring tools.
but there are certain features only pretty advanced CMS can capably do.
- If markdown isn't your source of truth, you cannot use the approach to scale to other sites or repositories. Every markdown site will need exactly one CMS
- The CMS might not be very capable to handle a humongous amount of content, because they are pretty simplistic by nature.
- Content Modelling is one-one mapped to your front-matter structures, so they're pretty coupled in that sense. The models/collections are content-derived, and can only be extended to support what you can and must keep in markdown. Also with too many collections, it could get pretty involved
- Your media uploads are restricted by the max size Git allows for a certain repo
But even with the aforementioned limitations, having an option to co-locate content and code, in such a seamless manner makes the job of managing simple sites and blogs effortless.
Thank you for being till the end 🙌 . If you enjoyed this article, or learned something new, please take a second to tweet this article or share on LinkedIn so others can discover it. Or add to the discussion on Twitter.